Showing posts with label dress. Show all posts

Saturday, August 1, 2015

Summer Saltspring

I've been working through my summer bucket list: s'mores, fireworks, (tofu) hot dogs, a drive-in movie, popsicles, food trucks, a picnic, and of course, a new sundress. I decided to join the fun for Handmade by Heather B's Sundress Sewalong 2015. I love the rayon challis Sewaholic Saltspring I made last spring so much that I had to make a second.


This time I made a straight size 6 and did braided straps like Caroline. I was hoping to get away with making only three straps, braiding them together and then cutting the braid in half, but it was about an inch too short. I had to go back and repeat the whole process over again (womp, womp), but I love how the straps came out! I used the length of the tied straps on my first Saltspring as a guide.


I also went back and added a skirt lining towards the end. I was pretty lazy and tried this on over my clothes throughout, but I did a proper try-on at the end to decide on the hem length and discovered that it was much more sheer than I originally thought. Oooops. At least I discovered this in my bathroom and not looking at blog pictures later. I used this method from the sewalong and cut off about 2 inches from the bottom.


Other than that, there's not a whole lot else different about the construction. I did do a machine invisible hem this time because the handstitched hem on my first one is, to be completely honest, not great. I just don't have the patience for handsewing, and hemming is by far my least favorite part of dressmaking already. I'll take a slightly-more-visible hem over hours of trying (and mostly failing) to keep tiny hand stitches even.


The fabric is a bit outside of my usual color pallet, but I actual love how obnoxiously bright this is. I found about five yards of this drapey poly blend at a thrift store for 3 dollars and snatched it right up. It's a breezy, effortless dress that screams "summer".


Until next time, I'll be soaking up every minute of summer, reading in the shade by the pool and making infinity batches of fruit bars with my new popsicle molds. Happy summer!

Saturday, November 15, 2014

Lady Skater

I've been trying to up my knits game recently, and after success with the Renfrew and Strathcona Tees, I decided to take the full on plunge into a dress. I waffled for a while between the Colette Moneta and the Kitschy Koo Lady Skater, and eventually went with the Lady Skater, because, reality check, I suck at gathers. And I have to say, I think I made the right call.

Although it was an uphill battle the whole way because of my fabric choice. I always have to make things difficult for myself don't I? I bought this rayon knit impulsively from JoAnn.com when they had a free shipping deal and I was feeling too lazy to drive to the burbs. When it arrived in the mail, I was disappointed to discover that it was thinner, stretchier and more sheer than I was expecting. Womp womp. Still I liked the print and I hate letting things go to waste so I decided to just go for it.


I made a bodice muslin out of the leftover fabric from Brian's Scracotha Tee, and it fit remarkably well. I usually need to add an inch to the waist because I'm tall, but this pattern seems to be pretty long-waisted and I ended up taking it out. I was also very pleased that the sway back adjustment from the Kitschy Koo blog worked like a charm.


My muslin was a straight size 3 in a stable knit, and it was a little clingy at the waist so I decided to grade out to a size 4. Big mistake. My thin, stretchy knit just grew and grew and grew as I sewed this up and I had to take it in twice. I have no idea what size I ended up with, but I think in general this dress (at least on my body) needs a pretty fitted waist. I also had to take in the underarm by a good inch and half and narrow the sleeves. Looking at these pictures, it looks like maybe I could have taken it in a little more.


The hems on the skirt and sleeves were a nightmare. I used about a mile of WonderTape, and still had some tunneling with my twin needle. I think a really stretchy knit like this needs a full on fusible web tape. I managed to smooth it into submission with a combination of steaming and pressing, but I'm a little nervous to see how it looks when it comes out of the wash.

As frustrating as the process was, I am pretty happy with the pattern and the finished product. I think the neckline is very flattering:


 And I LOVE the swish of the skirt. It's perfect for playing in the leaves on a fall day.


 Here are the details:

  • Pattern: Kitschy Koo Lady Skater PDF - This was a reasonable number of pages and easy to put together, but I was slightly annoyed that the sizes were distinguished by color because I don't have a color printer.
  • Fabric: 2 1/2 yards of rayon blend knit
  • Sizing: 3 in the shoulders, and probably a 3 in the waist and skirt as well.
  • Alterations: 
    • 1/2" broad shoulder adjustment
    • 1/2" swayback adjustment
    • Added 1" to length of sleeves instead of using cuffs.
    • Added 1 1/4" to length of skirt but later cut off 1", so really no change
  • What I'd change for next time: 
    • Cut a straight size 3.
    • Don't add any length to the bodice, and maybe make it a smidge shorter. It's hard to tell where I landed with how the fabric stretched out as I sewed.
    • Don't add any length to the skirt.

I'm already planning another version in a ponti knit, this time a Lady Skater-Renfrew mash up with a cowl neck, like this one and this one.

Monday, September 15, 2014

Spider-Man Dress


 And now for the big reveal: my Spider-Man dress for DragonCon!


My girlfriends did a group costume on Saturday night, and the theme was Retro/Pin-up Superheroes. Although duplicates were allowed, I started telling everyone who would listen months in advance about how I wanted to do Spider-Man, my all-time favorite super hero. Once word got out that I was sewing a dress from scratch, people started acting like sewing was super power! I felt like kind of a badass. Yeah, I can whip up adorable baby shirts by day and custom fit-and-flare dresses by night. I'm your friendly neighborhood Spider-Man.

This is me, um, "web slinging."


Okay, back to the dress. I used Simplicity 1755, one of the Leanne Marshall (of Project Runway) designs. I cut a 10 in the shoulders and then blended to 12 in the waist, with my usual SBA and 1" waist lengthening. I had some major fit issues in the beginning and went through two muslins, but looking back I think I was just really tired or temporarily lost my fitting Spider-Sense or something, because it really shouldn't have been that hard. It's probably still a little too big in the bust, but c'est la vie.


I made the Spider-Man symbol by fusing some heavy-duty interfacing to some black fabric from my stash and then carefully gluing it on with Tacky Glue and a paint brush.


The blue fabric is a poly crepe. For the bodice, I used a shiny spider-web mesh I got on clearance after Halloween last year (yes, that's how far in advance we plan for DragonCon haha!), and underlined it with cheap quilting cotton. I really like the final effect, but the mesh is very delicate and the spider-webs have rubbed away in places. I kept trying to handle the dress like glass as I sewed it up, terrified would ruin it before I even got a chance to wear it!


One of my favorite things about the dress are the cute upturned sleeves with the button closure. I think the instructions have a mistake though. The diagram shows the button loop at the top of gap, but the loop actually has to be in the middle. The marking on the pattern piece seems to be in the right place though, so I'd stick with that.


My other favorite part is the in-seam pockets!

As for things I didn't love so much, I'm not sure that the pleats look any better or all that different than a simple gathered skirt would have. It was a huge pain to mark and baste dozens of pleats, and it took two tries to get the two sides even. Here's a pic without the belt you you can take a look and decide for yourself:


The other thing I wasn't crazy about was how the collar came out, but I think that had more to do with my inexperience and a the multiple layers of fabric than the pattern itself.


Still, though, I am pretty proud of this dress! It's probably the most technically challenging thing I've made so far. I got so into this dress and the matchy-matchy look of the 1960's along the way that I went kind of overboard with the accessories. I made the belt using a vintage belt kit I got at a thrift store for $1, glued the spiderweb mesh onto the headband, and made a matching clutch!


I used a 5" purse frame from Joann's Fabric and this tutorial. It was juuuuuuust big enough to fit my cell phone on the diagonal, which is why the bag looks a little misshapen in the picture. It was fun to make though, even if I did end up with fingers covered in super glue by the end.

So that's my Spider-Man dress! I had a fabulous time, all of my friends looked drop-dead gorgeous in their retro costumes, and I'm already dreaming up plans for next year.


Monday, May 26, 2014

Savannah Saltspring

I just got home from a weekend trip to Savannah to celebrate my 5th(!) wedding anniversary. We went on a ghost tour, strolled around the squares, saw modern art and historic homes, and did some really good eating. And along the way, I got to debut my new Sewaholic Saltspring.


I apparently learned absolutely nothing from my last experience sewing on a deadline and finished this the day before the trip. I literally clipped stray threads as I was packing. I had been mulling over buying the Saltspring pattern, and when I found this beautiful rayon challis on clearance at Joann's (crazy, right?) I knew it was meant to be.


The rayon challis was the most challenging part of this make. I cut it in a single layer because it was a little too slippery to be trusted. It also frayed like crazy, so used about a gallon of fray check throughout construction after reading Marie's cautionary tale. Annoyingly, the rayon challis didn't play nice with my serger in a single layer. There were some touch and go moments finishing the pockets and skirt seams, and then when I got to the hem I had to skip serging altogether and place my faith in fray check. Worst of all, I had to do invisible hem by hand (uggggggggghhhhhhhhh). Good grief do I despise hand sewing - this took me several nights running and as meticulous as I tried to be, it's still a little dodgy. Grudgingly, I have to admit was worth the trouble though, because this dress felt like wearing a cloud in the sweltering Savannah weather. It was MAGICAL, you guys. This dress is a swishy, floaty cloud (with pockets!)


I skipped the muslin since there were already reviews filled with great advice out on the sewing interwebs. I left the zipper out, and I can add to the chorus that it's not necessary. I have no problems getting into this dress without it. I also followed the excellent advice of Lisa G. and added 1" inch to the skirt length - a floaty mini is NOT a good look on a windy day. As it is I just about had a wardrobe malfunction on the breezy River Walk. Consider yourself warned.


I cut a 6 in the bust, an 8 in the waist, and then back to a 6 in the hips. I probably could have gotten away with a straight 6, but I'm pretty happy with the fit. I decided I wanted less blousing, so I did my usual 1" lengthening on the waist of the lining and left the outer shell pattern piece alone. This gave me 1" of blousing instead of 2", which I think works better on my frame.


This is really the perfect dress for a summer day outdoors, and I think it'll get a lot of use. Here's to cookouts, picnics and walks in the park!

Sunday, March 30, 2014

Tea and Scones Dress

As much as I love watching shows like The Great British Sewing Bee and Project Runway, sewing under a deadline is definitely not for me. About month ago I got it into my head I would just "whip up a dress" for an upcoming fancy tea party with some girlfriends. Ha! Cut to me, last Saturday, frantically hemming at 12 pm with bedhead when I'm supposed to leave at 12:30. But, somehow, miraculously, I managed to finish the dress and pull myself together. Whew!


What really made the afternoon perfect was not the company, or the delicious tea, or the yummy miniature scones, but a passing comment by a friend who asked where I had gotten my dress because it fit so well. I could have done a Breakfast Club air fist right there at the tea table that 1) my dress didn't look Becky Home Ec-y (my biggest fear) and 2) I nailed the fit. Instead I gleefully explained that I made it and tried to convince her to give dressmaking a go. I think I may have my first convert, you guys!

Okay, okay, enough about me. The dress is Simplicity 1803 and it's made with a horrible polyester from Joann Fabric. Looking back, I have no idea why I used a GIFT CARD to buy this last year. For shame! I could have stocked up on notions or went home with a rainbow of serger cones, but instead I bought 100% polyester that's much girlier than I usually go for. In all fairness though, it doesn't wrinkle, and it's amazingly opaque for white. I'm wearing a black bra in these pictures, and you'd never know it.


All things considered, it went together pretty easily. I cut a 10 in the shoulders and then blended to a 12 for the waist and hips. I did my usual SBA, 1/2" lowering of the armholes, and 1" lengthening at the waist. It was actually pretty easy to fit because of the princess seams - just shave a bit off the curve and voila, smaller bust without any of the usual side effects. I am now completely enamored with princess seams.


Overall, this was a pretty straightforward make with a couple of tricky bits. One was the the notched neckline, which I ended up handsewing into place because I couldn't get it it centered on my machine. Even now, it's not perfect, but it's passable.


The other part I struggled with was getting the top edges in the back to line up. Maybe I accidentally stretched the facing out, because the dress met up at the waist seam no problem, but the right side of the back was a good 1/2" higher than the left. Or it may have something to do with the fact I was putting in the invisible zip, oh, 90 minutes before I was supposed to leave. In the end, I channeled my inner Tim Gunn, sternly told myself to make it work, and did some quick seam ripping and lowered the right side to mirror the left.


The only other change I made was to cut 2 1/2 inches off the skirt and used bias binding for the hem instead of folding 1/4" twice like the instructions called for. I figured the bias binding would be faster and easier, and when else was I going to use the rest of the packet I bought to finish the arm holes? And I have to say, it was kind of magical. I have never hemmed anything as quickly or easily in my life. Or maybe that was just the potent combination of coffee and adrenaline.


So I guess what I've learned from this experience is that every dress should be made with princess seams and bias tape. Every last one. Except that I'm already working on one with waist darts. Oops.
Also, sewing on a deadline and using polyester fabrics are generally terrible ideas that sometimes pay off. I'm sure this won't be the last time I set myself a ridiculous deadline, but for now, I'm going to take a breather and go at my (happy) snails pace.

Sunday, February 23, 2014

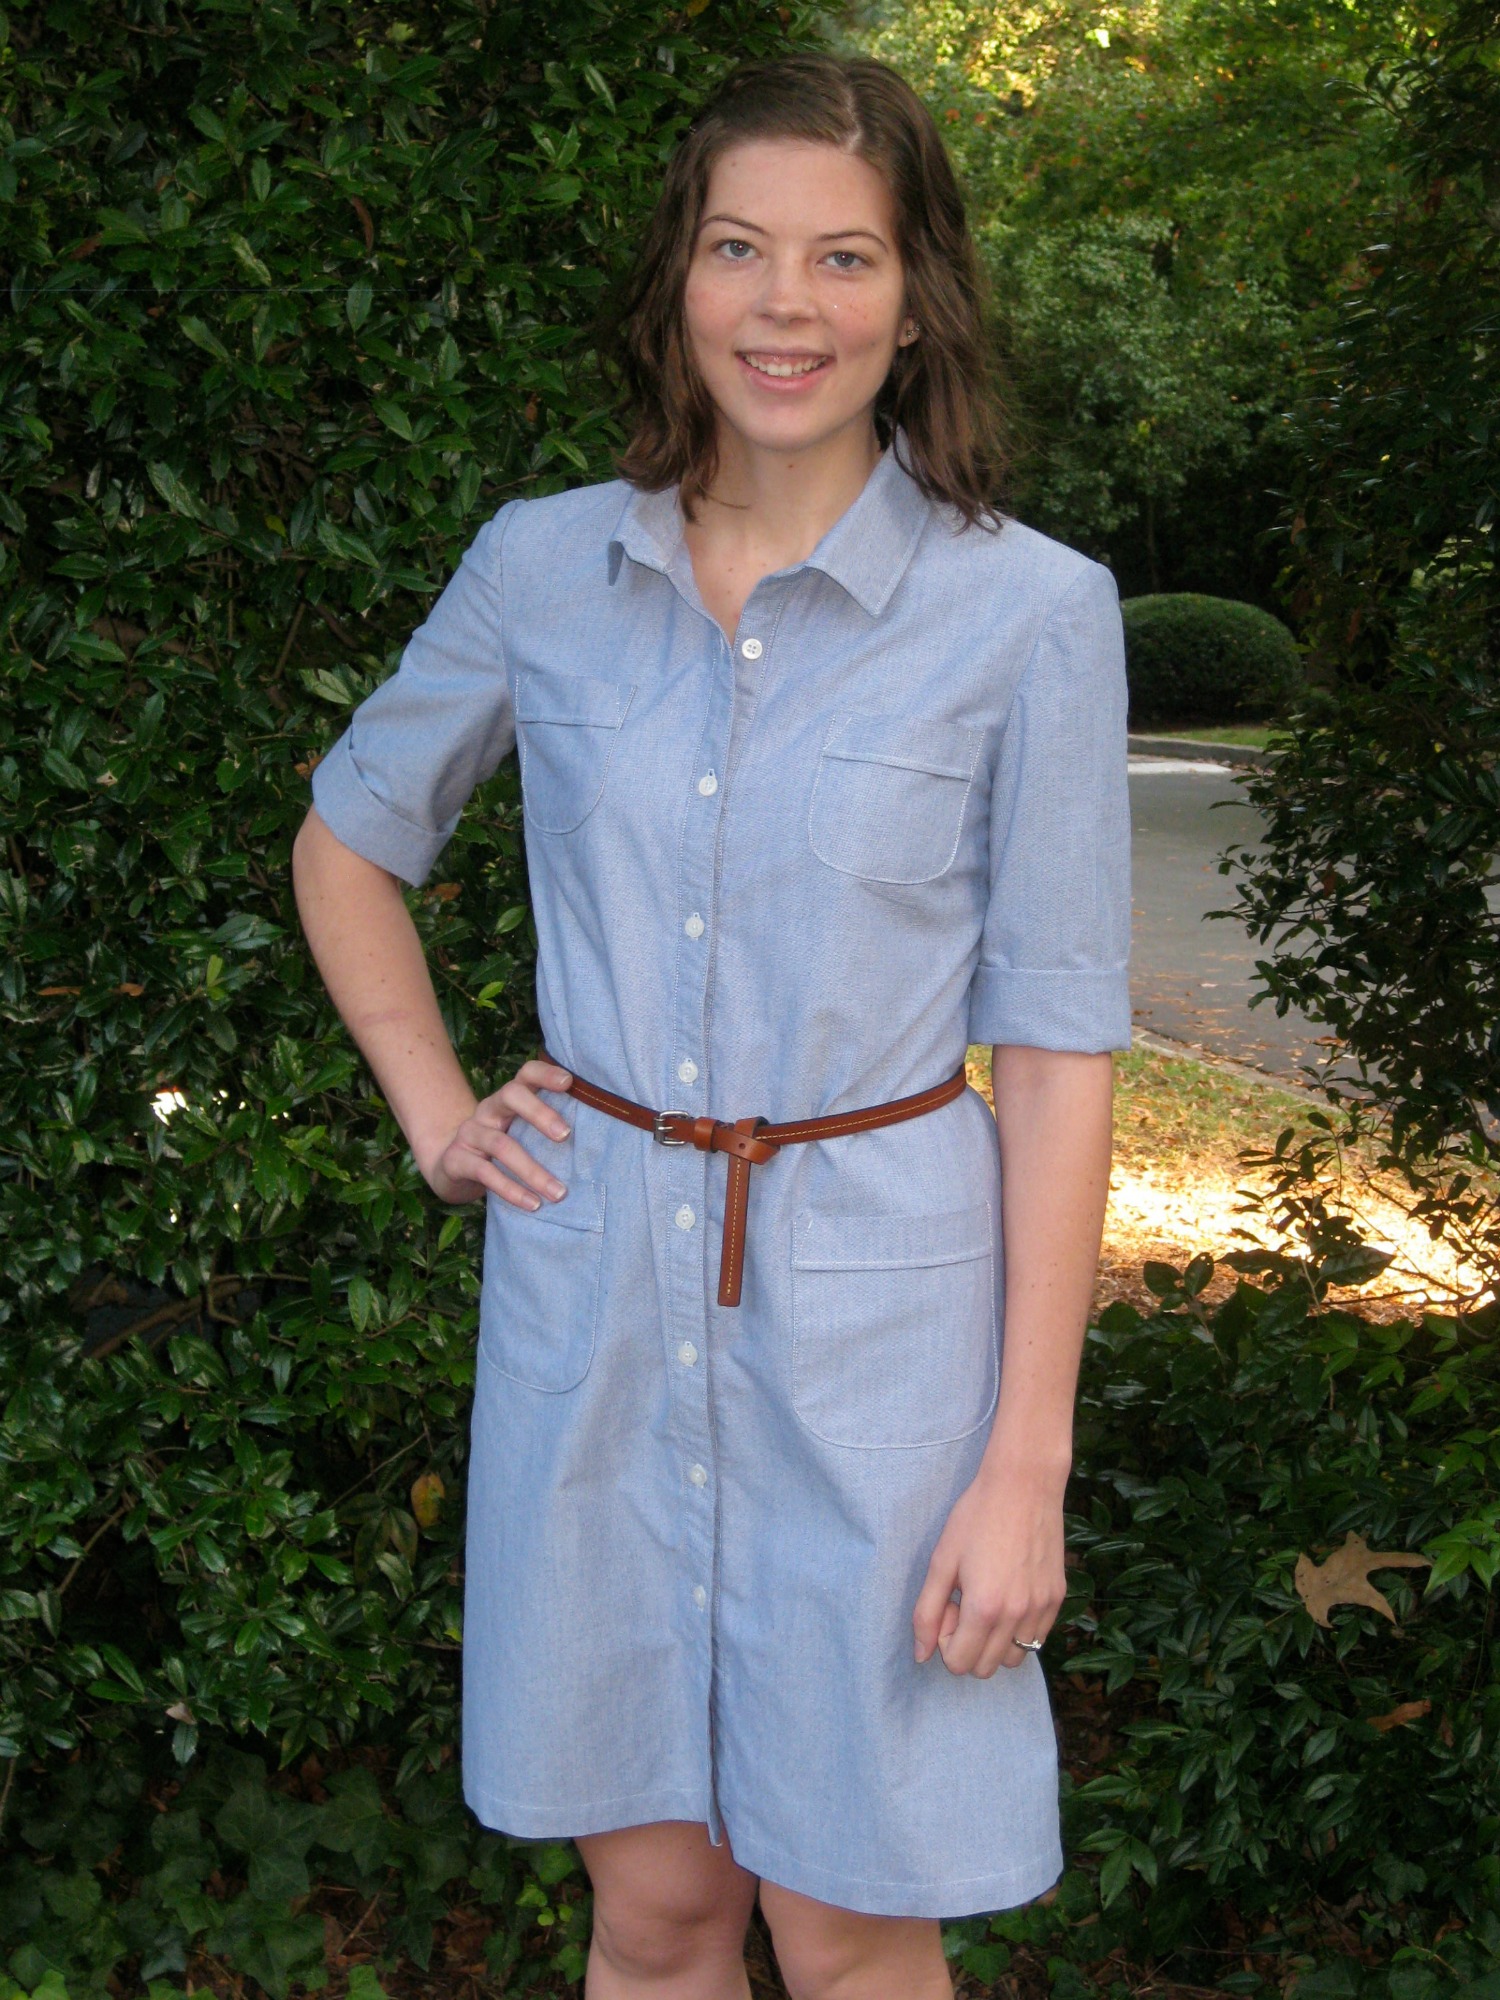
Buffalo Check Shirtdress

You guys, I can't believe I'm saying this, but I CONQUERED PLAID. Okay, okay, it's a buffalo check, which isn't quite as complicated as an unbalanced plaid, but whatevs. I agonized for hours over matching the plaid as I cut it out in a single layer, so this definitely, definitely counts.


If it's not clear already, I'm so, so happy with this dress. It really fits my style - a little tomboy but still feminine, nothing fussy or twee or overly trendy. And the finished product 100% matched the vision in my head.

I picked up the last of this bolt of buffalo check flannel for a song at my local fabric store, Gail K. Fabrics (highly recommended, if you're in the Atlanta area), with a shirtdress in mind. I figured if the plaid matching  went terribly wrong at least I hadn't invested much. But, if you'll forgive me for bragging, I showed this plaid who is boss. And I in no way cheated by using a gathered skirt and bias-cut placket. Those were, um, strictly aesthetic design choices. Yeah.


This is View C of Simplicity 2246, with the sleeves and pocket from View A. I made View A, the Lisette Traveler Dress a few months ago, and while I still adore that dress, I figured the more masculine flannel needed a more fitted silhouette.


I cut a size 10 in the top half, but the waist was a little tight so I let it back out by 1/2" on each side. I think I was too generous, as it's a little loose now and you can see there's some bunching around the waist in the back. I was hoping the back bodice darts would fix the fabric pooling issue I always seem to have in the small of my back, but not quite. One of these days I'll figure it out - maybe I need a swayback adjustment? For now I'll just pretend it's not there and enjoy how supremely comfortable the dress is.


I didn't want the skirt to be as voluminous as the pattern drawing, so I cut a size 6 in the skirt and trimmed down the side of the front pattern piece so it wouldn't have such a dramatic A-line. I used the skirt front from my Lisette Passport Dress (now sadly out of print) as a guide.

I think this may be a new TNT, because I didn't do many alterations. Like the other view, I did a SBA and added 1/2" to the sleeve and back piece to accommodate my broad shoulders and avoid the straightjacket feeling. This go around, I also lengthened the bodice by 1" and took the skirt up by about 4". The skirt is drafted crazy long. Like, perfect for a modest giantess.


My only complaint is, once again, the collar. It's a single piece instead of two, and as a result it tends to be floppy. One of my new goals is to learn to sew a beautiful shirt collar with perfectly pointy lapels - I had a hell of a time getting this collar to look half-way decent, and there are definitely things I wish I could change. I shudder to think of how janky this thing would be without my beloved edgestitching foot. Don't look too closely...except here's a close-up, because we're all friends here.


So it's a flannel buffalo check shirtdress, just in time for...um, spring? I made this dress during not one, but two snowstorms (a rarity in Atlanta), and now, just as I finish, it's a beautiful, sunny 60 degrees. Ah, well. I've been dreaming of sundresses for weeks, and now I have every excuse to sew one up!

Sunday, October 13, 2013

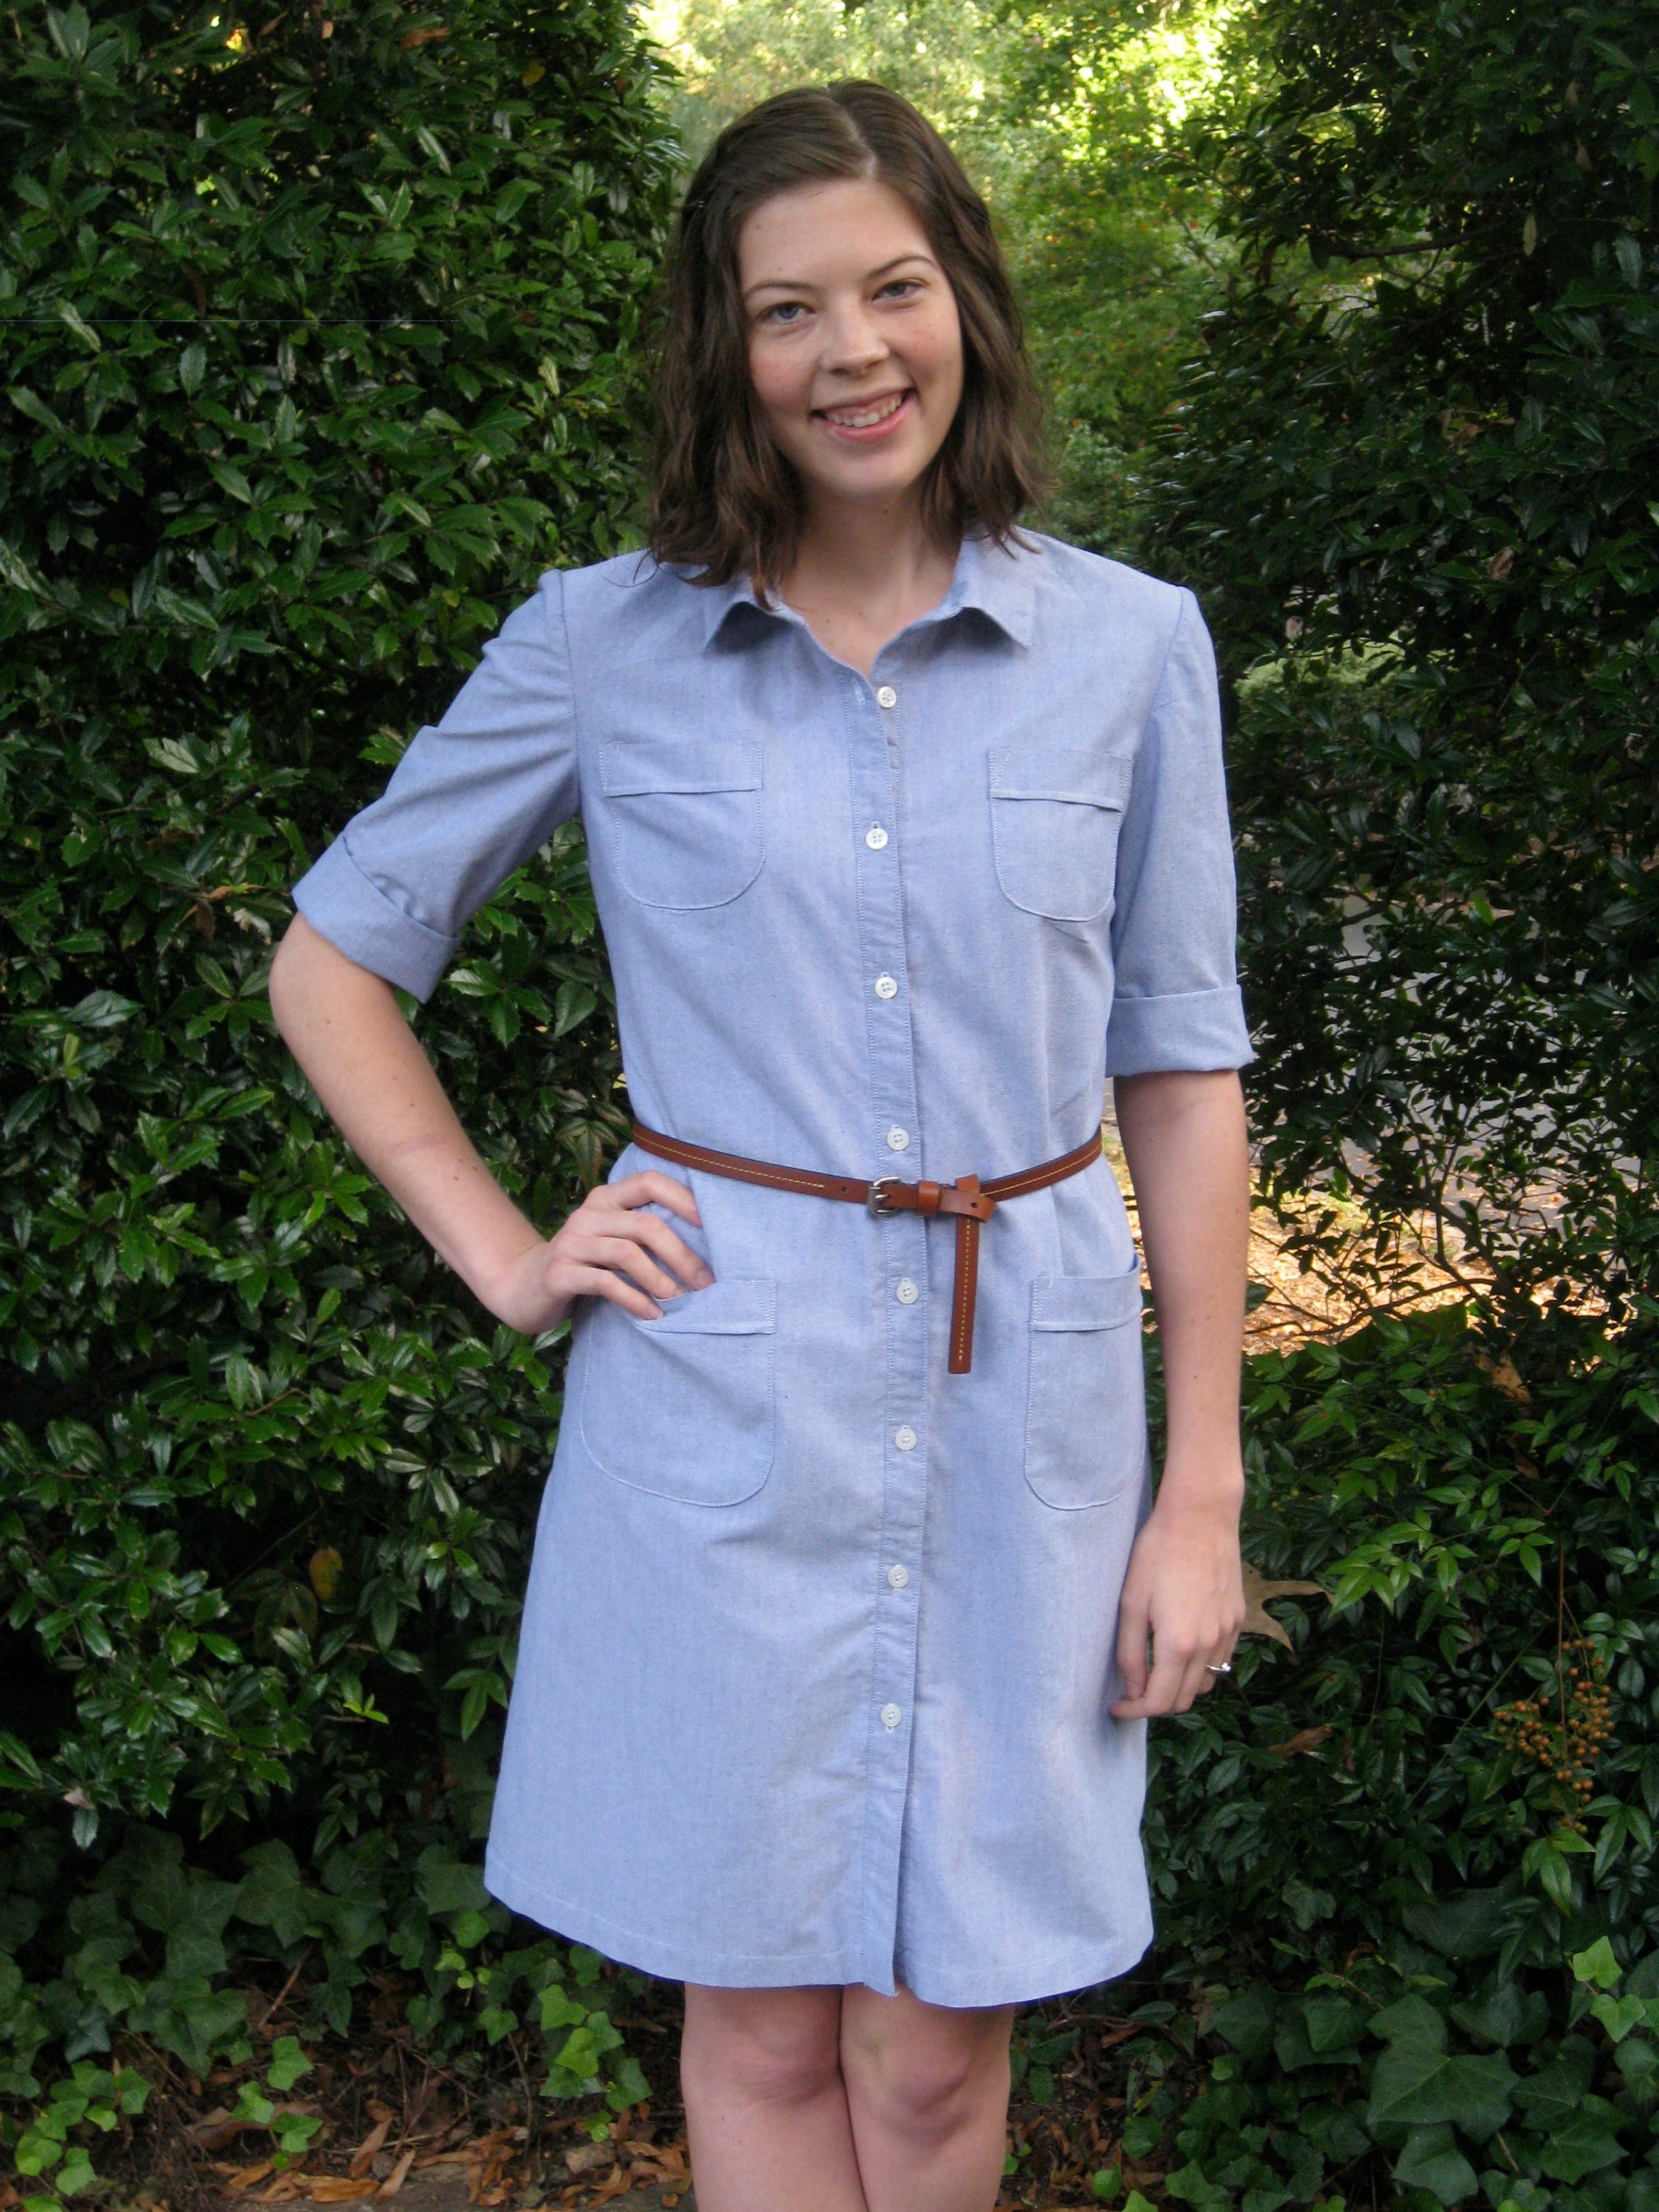
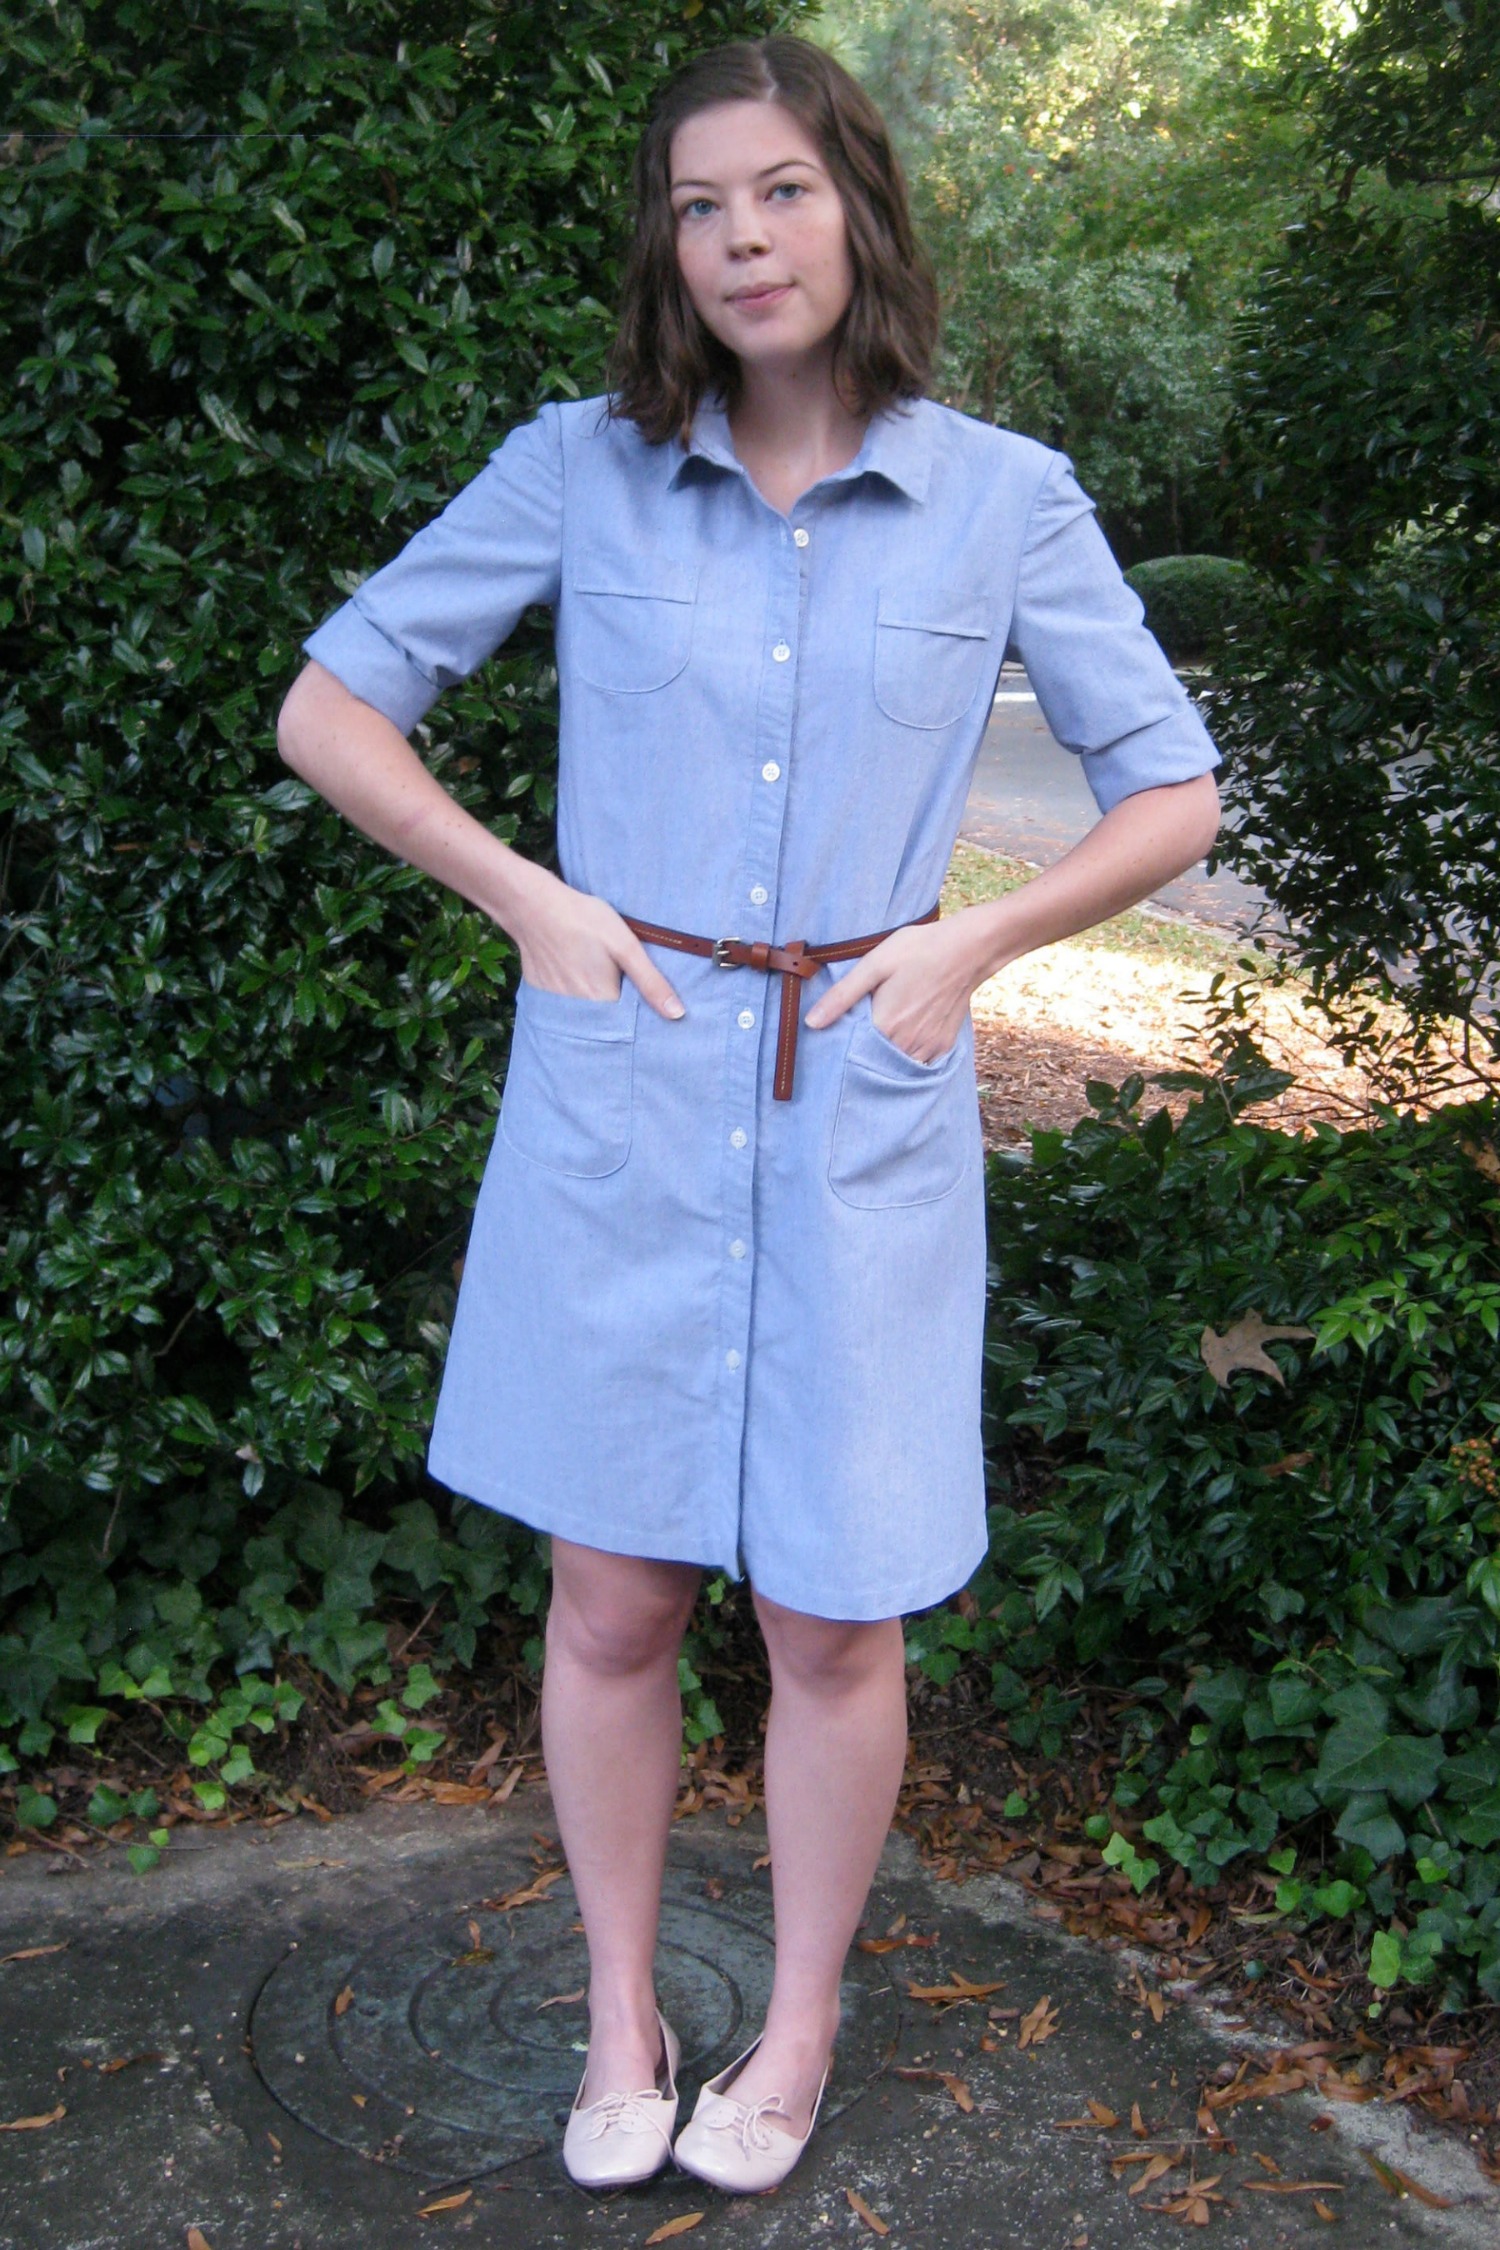
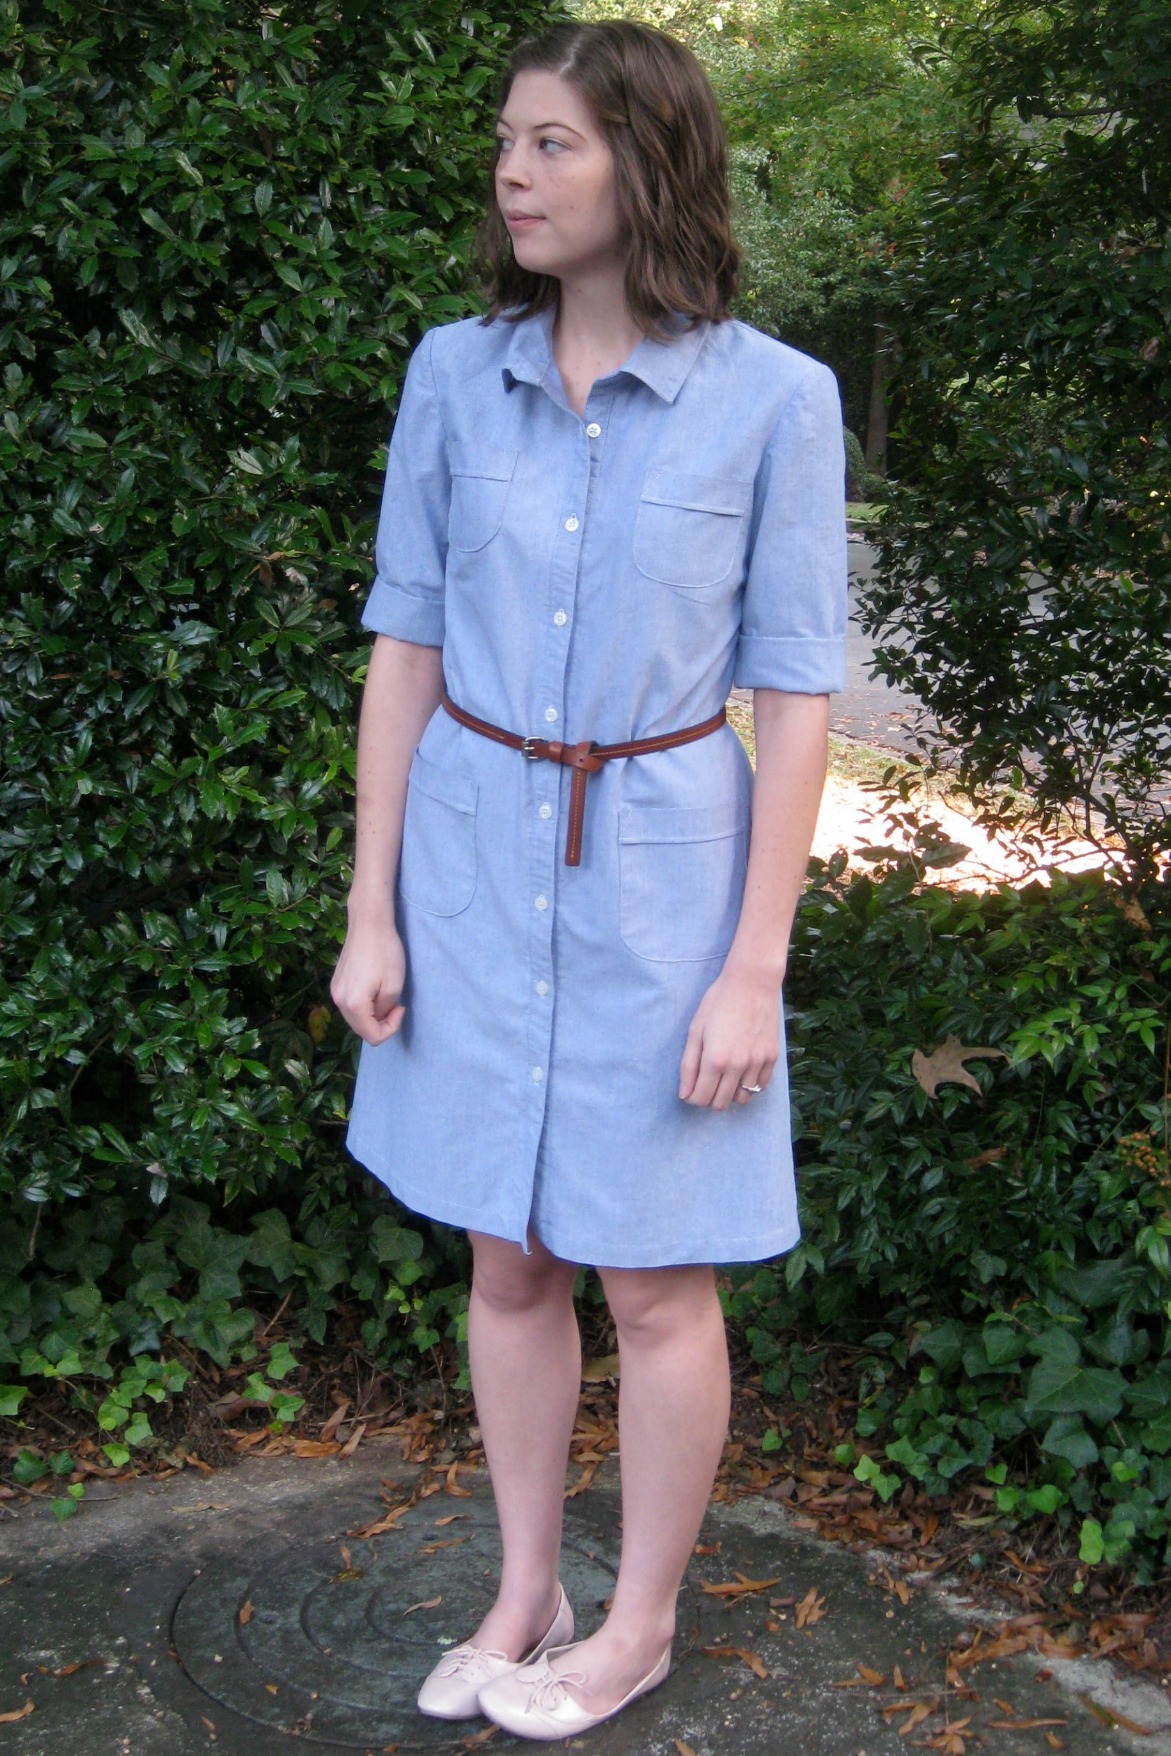
Lisette Traveler Dress

You guys, I am officially living the dream. You see, a long time ago (Spring 2011), in a far away land (Tampa, Florida), I was a novice seamstress struggling to make a supremely ugly pair of pajama pants. One day, I fell in love with the Lisette Traveler Dress, but I knew our romance was doomed from the start. With sleeves, a collar,  and 8 buttons, this dress was way, way beyond my skill set. But I couldn't resist the Traveler Dress' charms, so I bought the pattern and fabric, and put it away for some distant day after either magic fairy dust or a Rocky-style training montage gave me ability to do it. And that distant day, my friends, is today.


It cracks me up now that I completely ripped off the pattern picture, down to buying the Lisette Chambray. Beginner Emily had basically no understanding of fabrics, and so buying the exact fabric on the envelope was the only sure bet. Since then, I've even inadvertently stolen the model's haircut!


And really, it wasn't as hard as I thought it would be, just time consuming. The trickiest bit was dealing with the chambray, which frayed like crazy and made it hard to find notches and line pieces up properly. I cut a 10 in the shoulders and then blended to a 12 in the hips. I also made a few adjustments, but nothing too crazy - this is a well drafted pattern with clear instructions. I did an SBA and took some of the excess out of the center back. It's still a little big, but I can live with it.


I'm especially happy with the fit in the shoulders. I tend to find sleeves really constricting and have a hard time moving my arms forward to drive, type, cook dinner, give hugs....basically everything. Googling the problem, I stumbled upon this genius tutorial by Sunni of A Fashionable Stitch, which instructs you to add about 1/2" of ease to the back armsyce and sleeve. It worked like a charm!


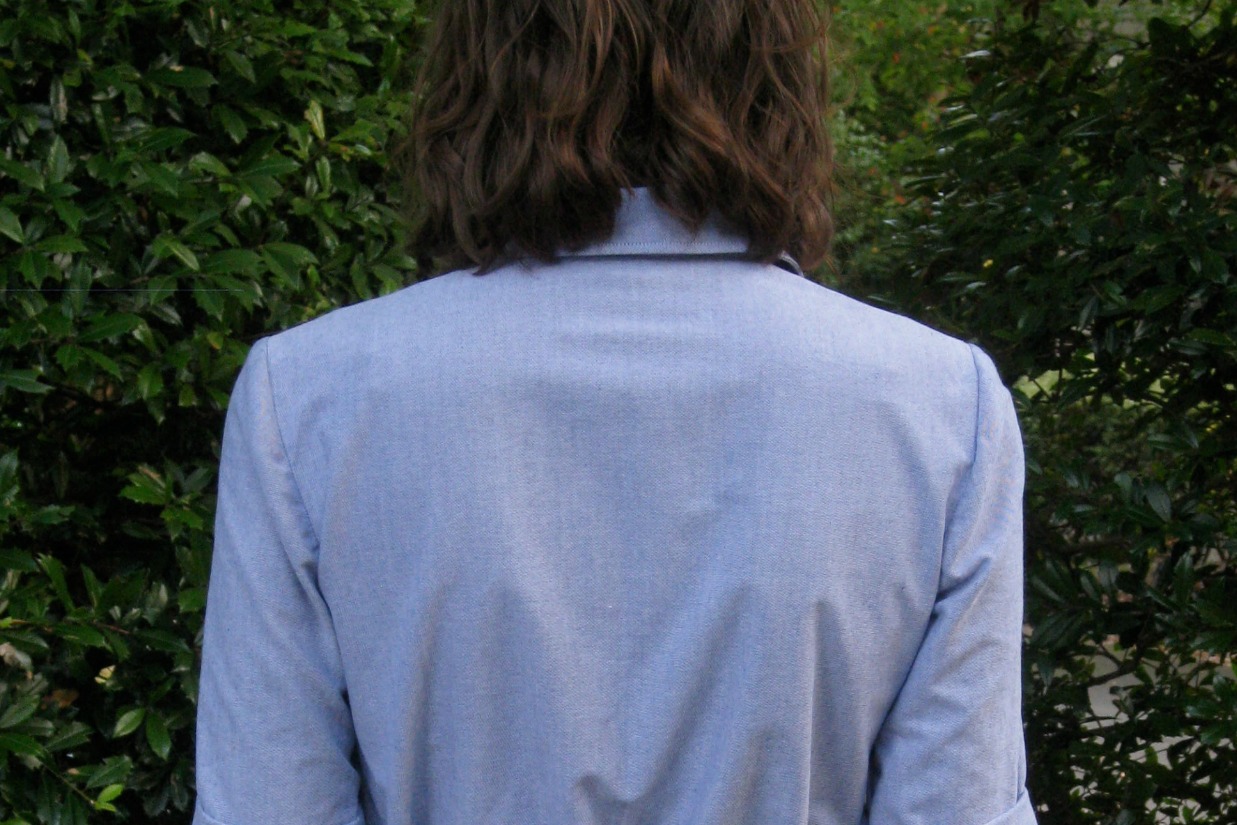
I actually set the sleeves in properly for once, and while they're not perfect, they're not half bad. I feel the same way about the collar. I was most intimidated by the collar going into this, but it turns out the collar and collar stand are all one piece. It's a nice way to ease yourself into shirt making, but it's probably worth the extra effort to have a separate stand. My collar doesn't sit as nicely as I would like.


The pockets are my favorite part! They were kind of a pain to sew up, but I'm so glad I did. They're not very functional, but they're very cute, and you could fit some money and a chapstick in a pinch.


I'm not sure if it's the most figure-flattering thing I've ever made though. When I asked my husband if it made me look especially small-chested and big-hipped, he very matter of factly replied, "It does, but I like that about you." My heart completely melted. I need a gentle reminder now and again that beauty and attractiveness don't need to have such narrow definitions. It's okay to let my hips out of hiding sometimes!


Overall, I'm really happy with the dress. It feels like a real turning point, with more challenging construction and finishing techniques. This is also first time I'm not worried that it's blatantly obvious the dress is handmade. Plus, it goes really well with my pink oxfords, and I am always looking for an excuse to wear them!


And so, on we go to even bigger challenges! I impulsively bought a plaid flannel (it was $4 a yard!) a couple of weeks ago, without really thinking about pattern-matching. This is going to be an adventure.

Sunday, June 16, 2013

Lisette Passport Dress

Hello again! A couple of weeks ago I finished a second version of the Lisette Passport Dress (Simplicity 2209), but I am just now blogging about it due to bad weather, my photographer-husband's work schedule, and general ambivalence. I'm not so sure about this one you guys.


I got the fabric on the bottom half on clearance at Joann's, and I absolutely love it, but at just under a yard, I felt like I didn't have a lot of options. I wanted a skirt, but couldn't see squeezing a waistband in. Some others on Pattern Review have had nice results doing a solid top/patterned bottom combo with the Passport Dress, so I decided to give it a go. I had juuuusst enough fabric. 


As with my first version, I cut a 10 in the shoulders, blended to a 14 at the waist, and then to a 12 in the hips. I also lowered the arm holes by about 1/2".


The top is a twill from Joann's limited selection. I choose it because it matched the white-but-not-blinding-white of the skirt fabric. In hindsight though, it was probably too heavy a fabric to pair with the medium weight print. The darts are pretty prominent and the whole thing just feels heavy for a summer dress.


From the back, without accessorizing. My shoulder blades look weird here, but it's because I'm not standing up straight.


Just to give you an idea what the dress looks like on its own. I definitely plan to wear it with the belt and cardi. 


Both fabrics were slightly sheer, so I decided to be brave and make my first lining. I am more than a little embarrassed to admit I used muslin because I was too cheap to buy cotton batiste. This is easily the tidiest the inside of any of my garments has ever looked.

So, overall, I dunno. I just can't see myself wearing this a ton due to poor fabric choices. I think the big lesson here is that I've really grown a lot in the past year, and it may be time to stop limiting myself to $5 a yard. Up until know I've been pretty reluctant to invest much in any particular project, since there's a fair chance it will be a disaster. I haven't had a wadder in a while though, so maybe it's time to treat myself to something slightly nicer.

On the plus side I did learn how to line a bodice using this excellent tutorial and how to sew an invisible hem with my machine. It's also the nicest invisible zipper I've ever installed. So, progress. And it does look a hundred times better with a belt.


As I side note, I got my knitting groove back and finished this awesome spider:


It's one of the projects in my Amigurumi Knits book and may be my favorite one yet.

I'm almost finished with my Tofino pants - can't wait for the pyjama party next week!