Monday, December 30, 2013

Hits and Misses of 2013

After waking up feeling reflective and seeing so many year in review posts in my feed, I decided to join Gillian in sharing my top hits and misses this year. I'm only going to share 3 though, because my output just isn't as prodigious as most bloggers. It's the downside of having so many hobbies, but I'm not willing to give any of them up either!

So let's get the misses out of the way:
1. Lisette Passport Dress

Okay, so this one wasn't a total disaster, but it was a good lesson in fabric choice. The top half attracts lint like crazy and is too heavy for summer. I also should have sprung for cotton batiste for the lining instead of using slightly scratchy muslin. Past Emily apparently had some magical thinking going on there about the power of fabric softener. I also wish I would have lowered the waistline by about 1/2", because the belt likes to slide down to my natural waist and doesn't cover the the seamline. I have to constantly adjust the belt when I wear this dress, which isn't often.

2. Miette Cardigan

I've seen so many cute versions of this in blogs and on Ravelry, but mine has been a terrible struggle. I've started over twice and ripped back major sections at least two other times. I can't seem to get the fit right, and I keep messing up the lace in glaringly obvious ways. Plus, a couple of weeks ago my cat got into my project bag, ate a bunch of yarn, and landed in the emergency vet. So, I think we can all agree this project is cursed, yes? Somehow though, I'm not quite ready to give up on it yet! It's hibernating for now, but I'm gearing up for Round 3 in 2014. Miette, you're going down.

3. Collete Beignet Skirt
 
By far and away my biggest disappointment of 2013. This pattern was stretch for my skills, and I spent two months slowly and painstakingly working my through it. In the end, it was too big and the buttons were crooked. I think I got a bit overambitious, and I definitely should have made a muslin.  It was supposed to be my special birthday skirt, but I've never worn it aside from blog pictures, and I doubt I ever will. I think I might come back to this pattern next fall though, and try again in a smaller size.

And, now, on to the hit parade!
1. Lisette Market Top

This was my first make with my new-to-me machine, and the first time I attempted sleeves. I was so proud of myself, and I still wear this all the time. I love this type of top - it falls somewhere in between a t-shirt and a button down, and so I can wear it practically anywhere.

2. Striped Sorbetto

I made this for a song using remnants and free pattern, and it's one of my favorite tops in my whole wardrobe. I learned to do an SBA, and I'm so glad I put in the extra effort. I love the fit, and I have plans to make two more of these using more remnants from my stash.

3. Lisette Traveler Dress

Easily my biggest sewing accomplishment to date. I figured out fitting problems that have been plaguing me from the start, and this has the nicest finish of anything I've ever made. I only got to wear it once before it got too cold, but I got a ton of compliments. I can't wait to bust this out again in the spring!

I kind of lost my sewing mojo after my Beignet skirt turned out to be a wadder, but writing this post was a good reminder of all the lovely, wearable things I also made this year. On to 2014!

Sunday, December 1, 2013

Colette Beignet

Hello again! It's been a while, hasn't it? I've been going to Halloween parties and birthday dinners, playing about a thousand rounds of this game, knitting and frogging my miette cardigan by turns (ugh fitting), and reading like a demon. You know, the usual.

I've also been fitting in some sewing here and there, and have spent the past month or so working on a Colette Beignet. After admiring the corduroy beignets by Andrea of Four Square Walls and Shona Stitches, I decided to hop on the ripoff train and make one myself (thanks ladies!).


It's a well drafted pattern and the instructions are pretty clear. All of my issues were, as usual, of my own making. I think after the success of my chambray shirt dress I got a little overambitious. I could knit pick my beignet death, so suffice it to say that the finish just isn't as nice as I want it to be. I mean, it's probably nicer than anything at Forever21 or H&M, but the whole point of sewing for myself is to exceed that (very) low bar.


Like others have pointed out, this was pretty time consuming, between the multiple panels, lining, pockets and twelve (twelve!!) buttons. The pattern is definitely intermediate, and I found it to be challenging throughout. It didn't help that I picked a fussy fabric that requires careful pressing and shows every ripped stitch. I do like the pockets though, and the panels are flattering.

I cut a size 8 in the waist and then graded down to a 6 in the hips, as recommended by the size chart. It's a little loose in the waist, so I probably should have cut a straight 6. It is pretty comfortable though, and as Tasia from Sewaholic always points out, you need room to eat a big lunch. Which is pretty important when you've got leftover butternut squash lasagna to devour. I did try to cinch it in at the waist a little bit, and now the buttons don't line up (argh!). If you see me on the street, pretend you don't notice, okay?


I used quilting cotton for the facings to reduce bulk. This floral print already in my stash from my remnants haul from Fabric World, and I love how it came out.


Overall, I'm kind of disappointed in this one. I'm not sure that it was the best choice for my figure, or match between pattern and fabric. Maybe I should have chosen a darker colored corduroy? What really tears me up is that my mom sent me the pattern and money for fabric for my birthday. After such a thoughtful, generous gift, and weeks of work, I feel terrible that the final result is so meh.


Chalk it up to a lesson learned. On the bright side, this only took a little over a yard of 60" fabric, so I think have enough to make a Grainline Moss skirt. On we go!

Sunday, October 13, 2013

Lisette Traveler Dress

You guys, I am officially living the dream. You see, a long time ago (Spring 2011), in a far away land (Tampa, Florida), I was a novice seamstress struggling to make a supremely ugly pair of pajama pants. One day, I fell in love with the 
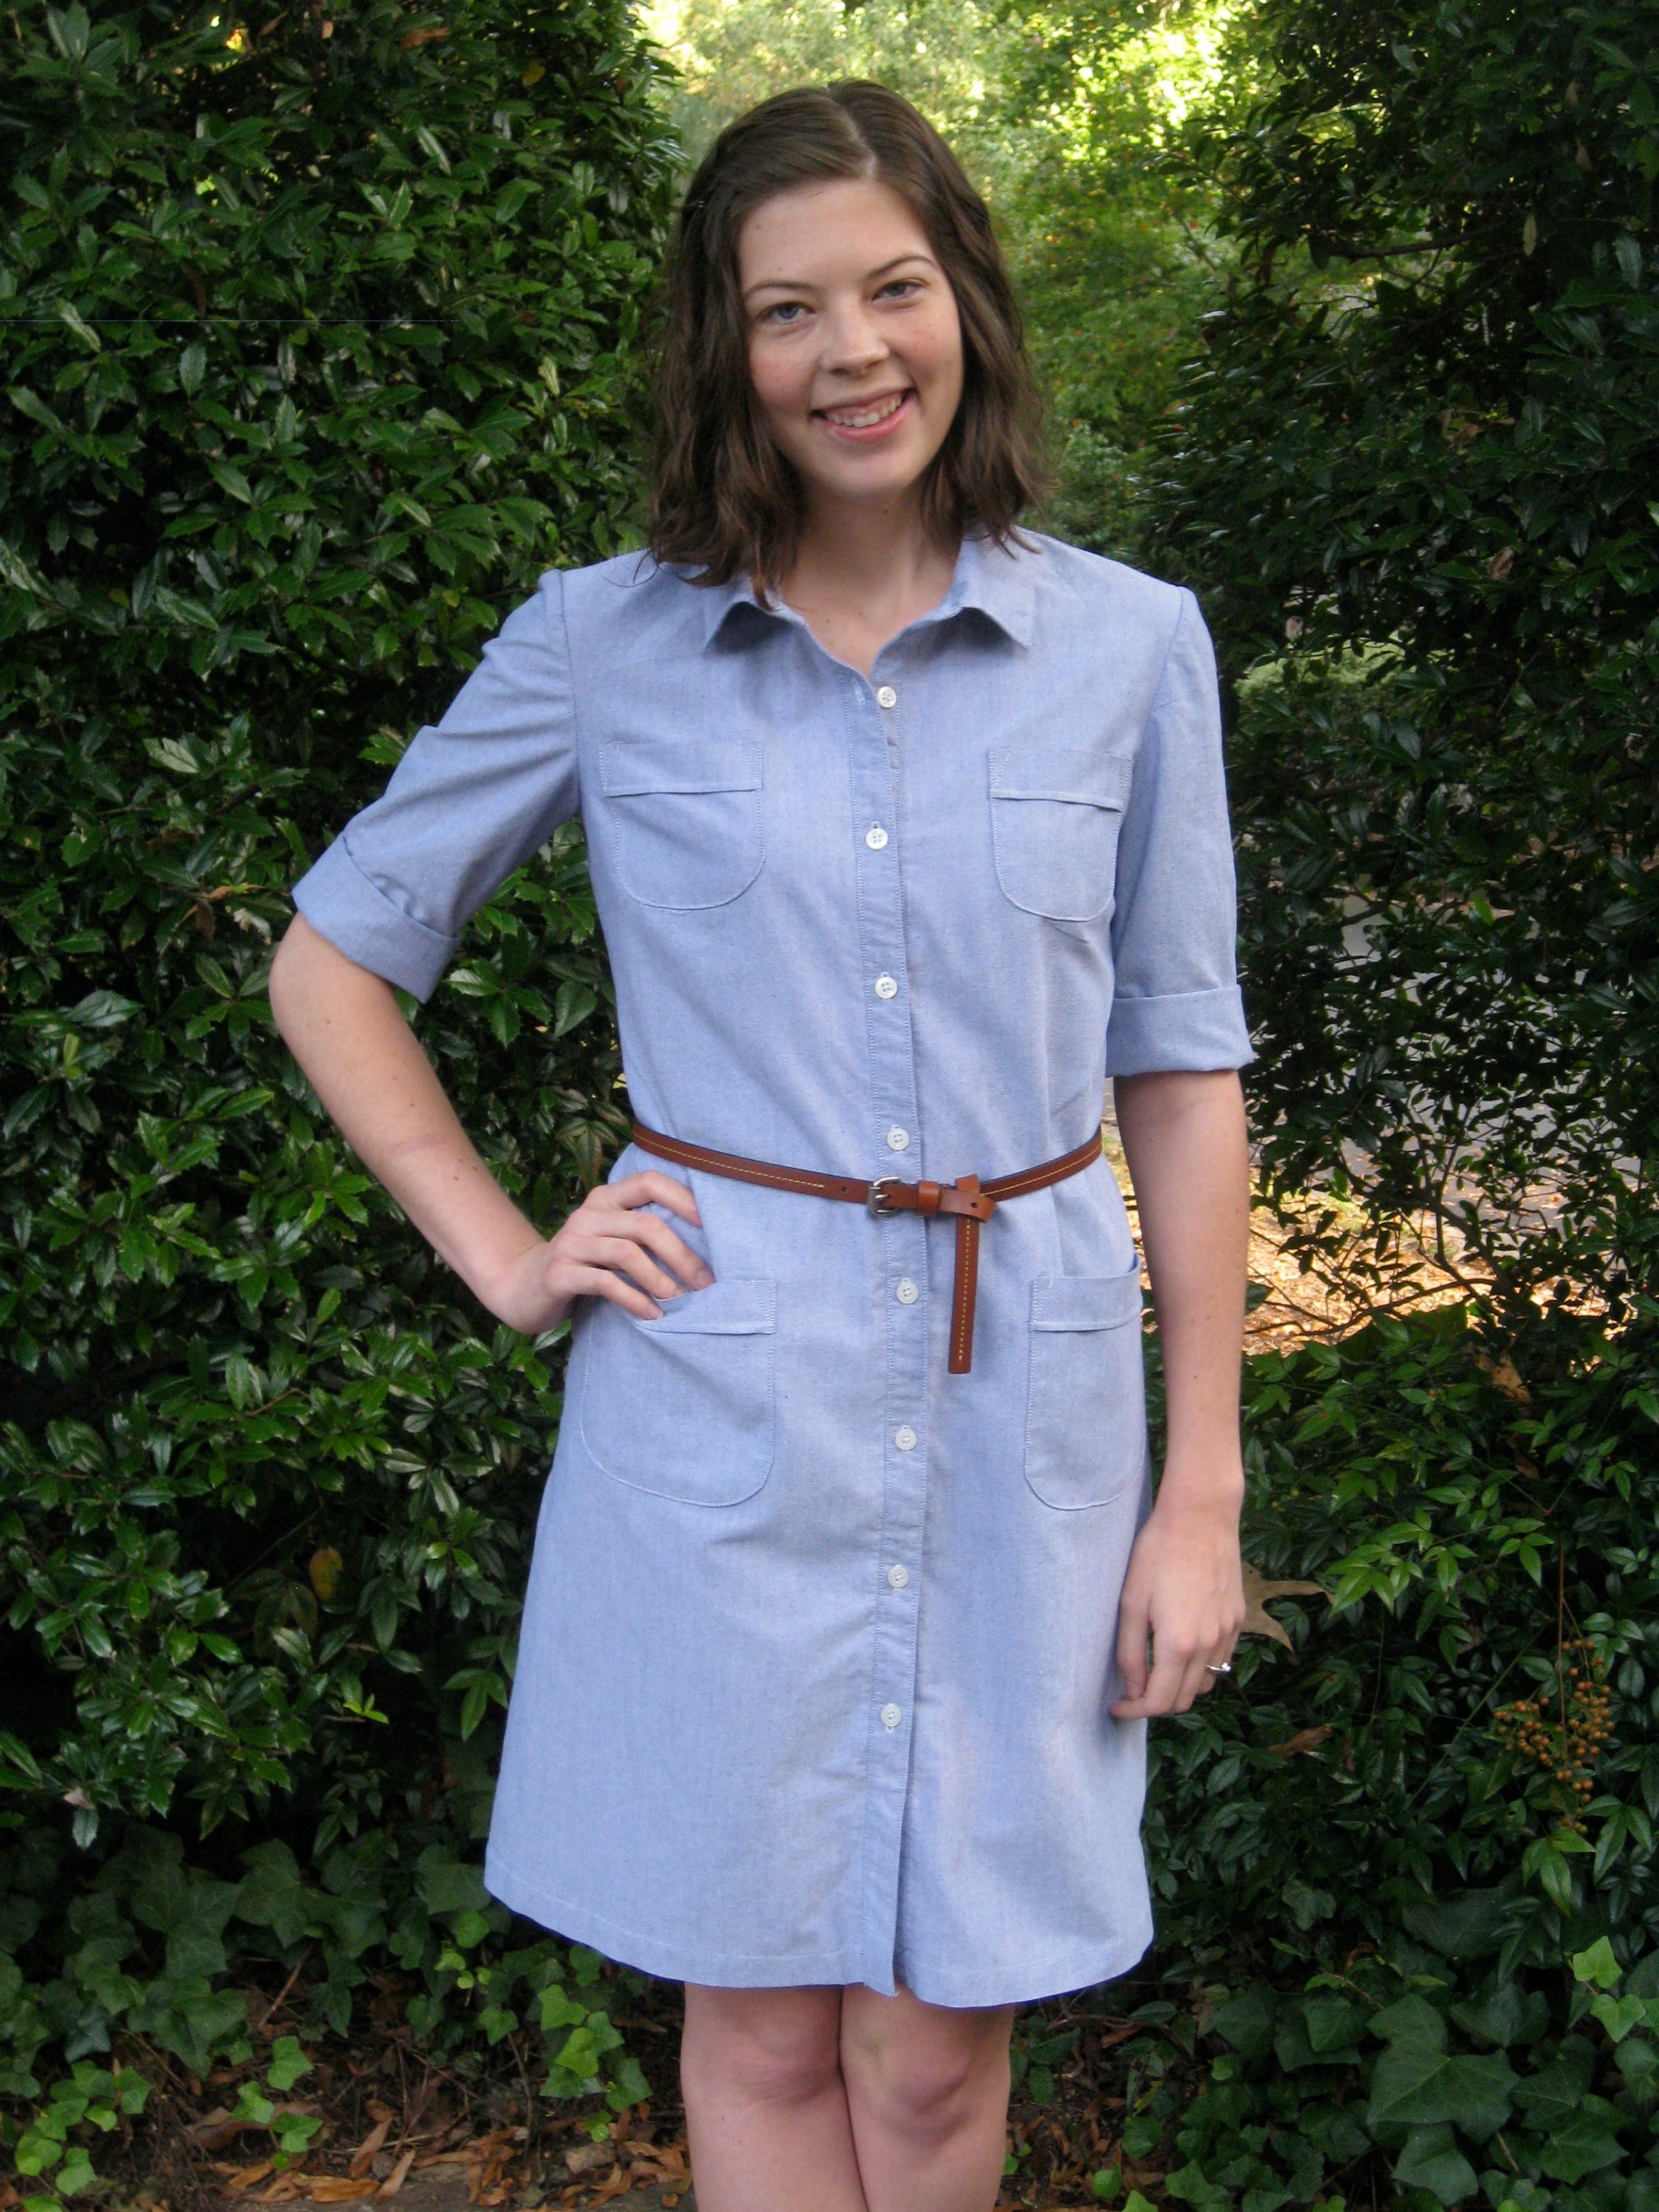
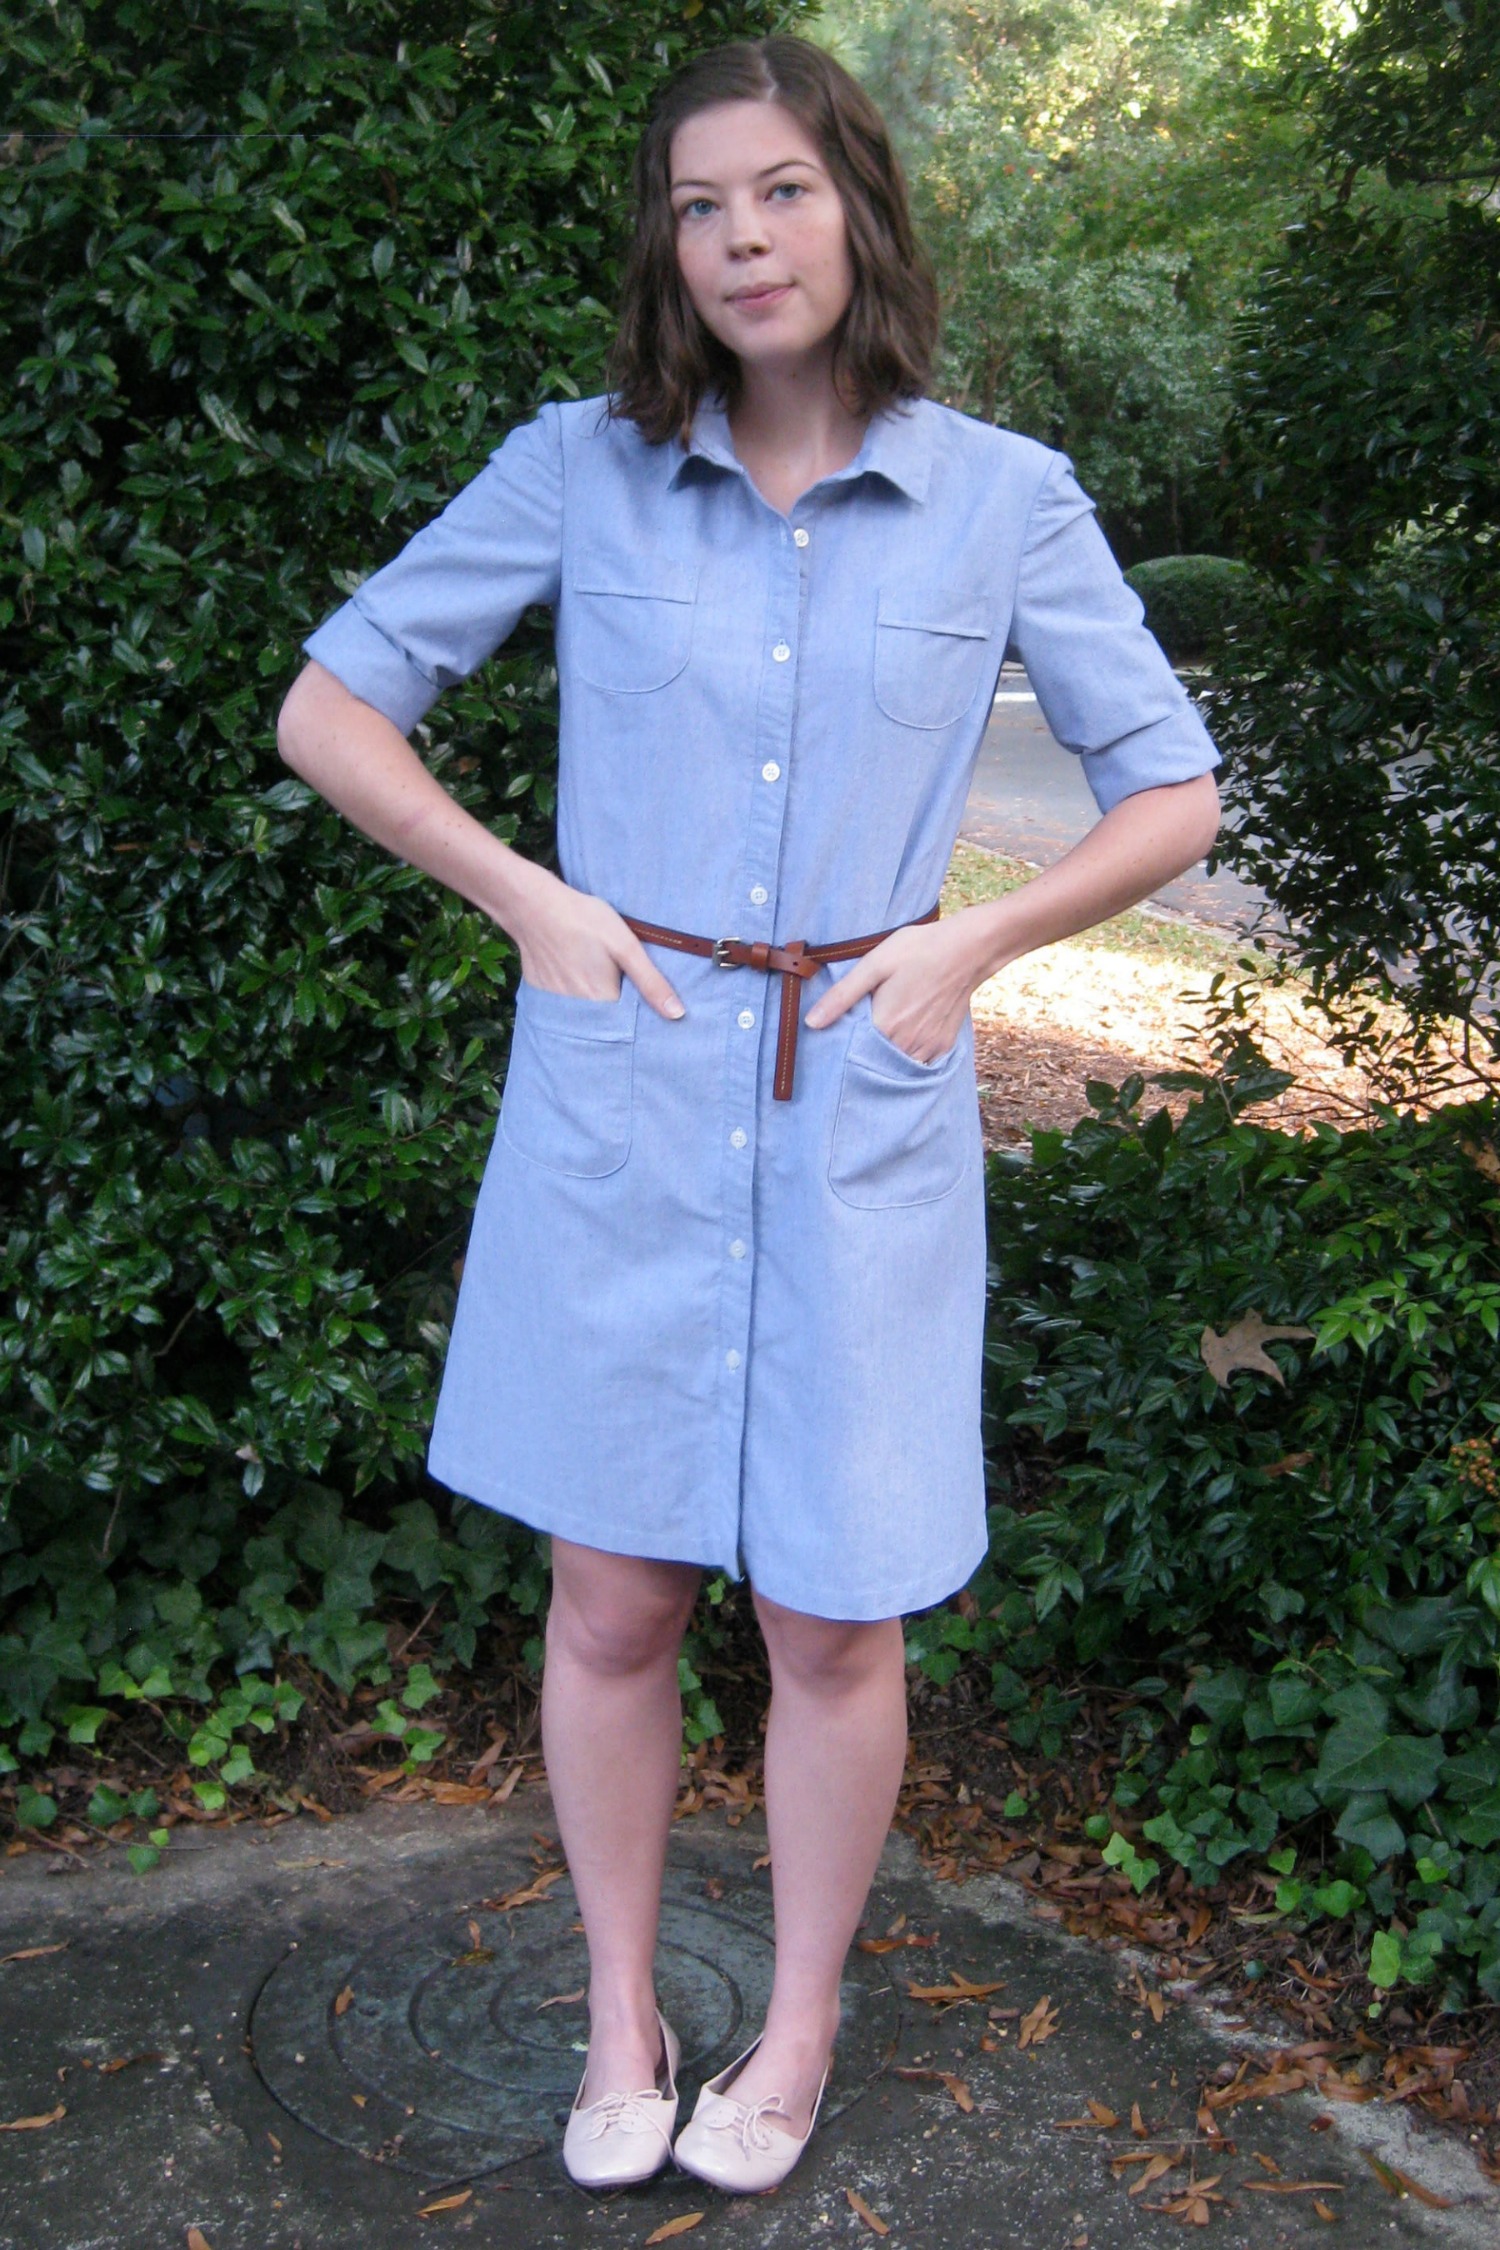
Lisette Traveler Dress, but I knew our romance was doomed from the start. With sleeves, a collar,  and 8 buttons, this dress was way, way beyond my skill set. But I couldn't resist the Traveler Dress' charms, so I bought the pattern and fabric, and put it away for some distant day after either magic fairy dust or a Rocky-style training montage gave me ability to do it. And that distant day, my friends, is today.


It cracks me up now that I completely ripped off the pattern picture, down to buying the Lisette Chambray. Beginner Emily had basically no understanding of fabrics, and so buying the exact fabric on the envelope was the only sure bet. Since then, I've even inadvertently stolen the model's haircut!


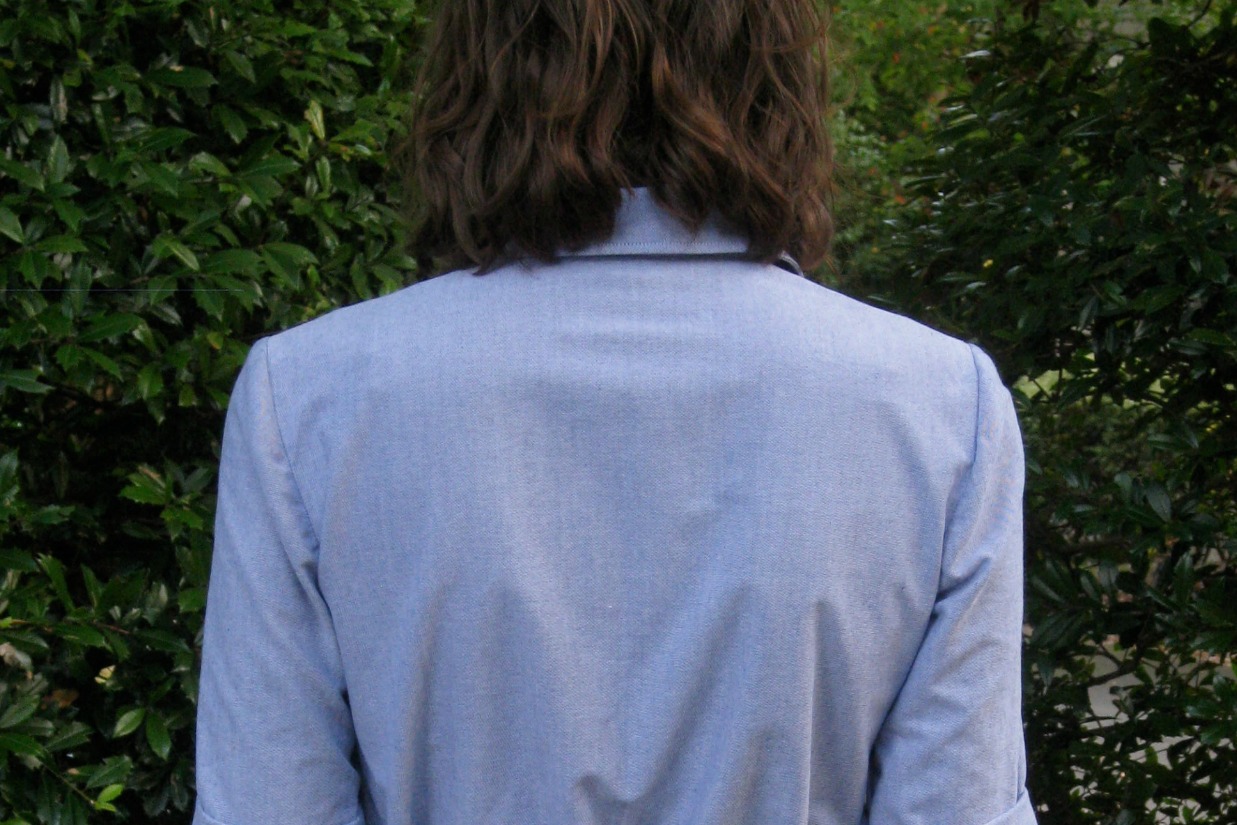
And really, it wasn't as hard as I thought it would be, just time consuming. The trickiest bit was dealing with the chambray, which frayed like crazy and made it hard to find notches and line pieces up properly. I cut a 10 in the shoulders and then blended to a 12 in the hips. I also made a few adjustments, but nothing too crazy - this is a well drafted pattern with clear instructions. I did an SBA and took some of the excess out of the center back. It's still a little big, but I can live with it.


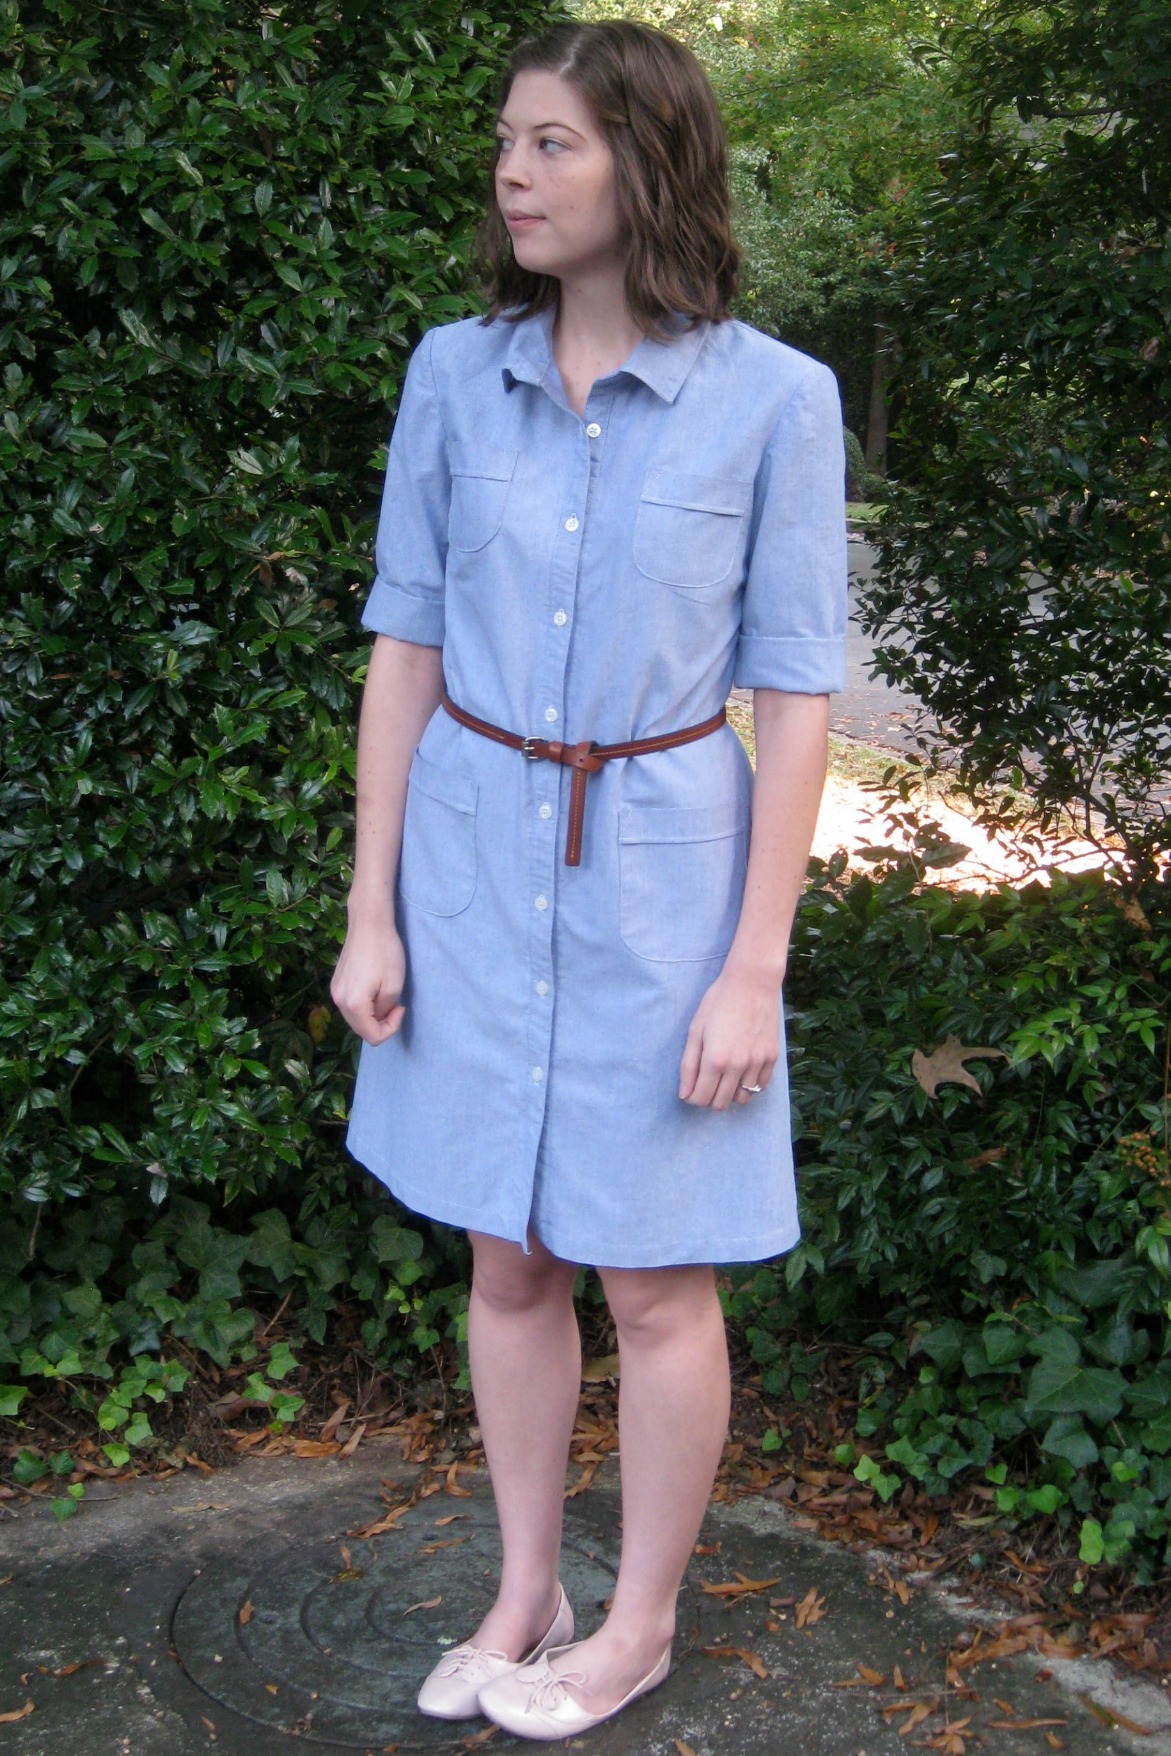
I'm especially happy with the fit in the shoulders. I tend to find sleeves really constricting and have a hard time moving my arms forward to drive, type, cook dinner, give hugs....basically everything. Googling the problem, I stumbled upon this genius tutorial by Sunni of A Fashionable Stitch, which instructs you to add about 1/2" of ease to the back armsyce and sleeve. It worked like a charm!


I actually set the sleeves in properly for once, and while they're not perfect, they're not half bad. I feel the same way about the collar. I was most intimidated by the collar going into this, but it turns out the collar and collar stand are all one piece. It's a nice way to ease yourself into shirt making, but it's probably worth the extra effort to have a separate stand. My collar doesn't sit as nicely as I would like.


The pockets are my favorite part! They were kind of a pain to sew up, but I'm so glad I did. They're not very functional, but they're very cute, and you could fit some money and a chapstick in a pinch.


I'm not sure if it's the most figure-flattering thing I've ever made though. When I asked my husband if it made me look especially small-chested and big-hipped, he very matter of factly replied, "It does, but I like that about you." My heart completely melted. I need a gentle reminder now and again that beauty and attractiveness don't need to have such narrow definitions. It's okay to let my hips out of hiding sometimes!


Overall, I'm really happy with the dress. It feels like a real turning point, with more challenging construction and finishing techniques. This is also first time I'm not worried that it's blatantly obvious the dress is handmade. Plus, it goes really well with my pink oxfords, and I am always looking for an excuse to wear them!


And so, on we go to even bigger challenges! I impulsively bought a plaid flannel (it was $4 a yard!) a couple of weeks ago, without really thinking about pattern-matching. This is going to be an adventure.

Thursday, October 10, 2013

Ups and Downs

Oh, hey, guess what? I'm today's Featured Member on Pattern Review!


I'm sure it's a random pick by some computer program, but still, it was a really nice way to start the day. I have to admit I got a little thrill seeing my picture on the home page.

And it was especially nice, because yesterday was kind of a rough day. I'm furloughed because of the government shutdown, and so I was home alone sewing yesterday afternoon when I SEWED THROUGH MY INDEX FINGER. Like, completely through.  I have a an entry and exit wound, but I'll spare you the disgusting sight. My machine jammed while in the middle of a button hole, and I stupidly tried to unjam it by poking at the needle. I had to unjam the machine so I could get my finger out, pull out two threads that went all the way through my finger (*shudder*), and then give myself first aid, all while willing myself to not panic or throw up. But after I calmed down and realized I didn't even need stitches, I finished those damn button holes. Final score: Viking 1, Emily 1.

Then later that evening I was working on my Miette cardigan (yup, jumping on the bandwagon!), and realized I need to start over. I'm 44 rows (1 1/2 balls of yarn) in, and it's pretty disheartening. I messed up the lace on one section of the collar, which I might ignore as a "design feature", if it weren't for the fit issues. The angle of the raglan is off - it ends way over in the middle of my arm instead of my armpit.


Then there's this weird bunching of fabric when I try to stretch it to fit anyway. Strangely, it meets nicely in the center, but doesn't fit at all in the shoulders.


I think maybe I need to go up a size so it fits across my shoulders better? I knew the size 8 needles were too small to get gauge, so I went up to a 9 but didn't bother to make a second swatch. Gail over at Today's Agenda did a really detailed knit-along, and her posts are making me think perhaps I should have gone with the size 8 needle but followed the 36" directions. Such is life. I did learn lots of useful information about how to choose the best size.

In happier news, I finished this guy last week as a "Thanks for coming to see me!" gift for my Mom, who came to visit last weekend.

 
It's my second octopus from  my Amigrumi Knits book. It's got loads of quirky animals - I definitely recommend it if you're looking for a break from fitting!

Thursday, October 3, 2013

Dolman Sleeve Top

Recently, I did the impossible: I sewed something in a single day. One. Single. Day.


I am a very slow sewer and it usually takes at least two weeks, if not several, to finish anything.
But the Dolman Sleeve Top by Cation Designs is a fun, quick pattern. Thanks Cindy! I wasn't sure how the silhoutte would look on me, but I figured with a free pattern, and free fabric I had nothing to lose. And I really like it!


Yes, the fabric was free too. My mom works a community theatre, and she sent me a whole box of remnants - it was like Christmas had come early! It was all left over from shows, or was donated in pieces too small to turn into costumes. But remnants are kind of my jam. I love the challenge of squeezing something useful out of leftovers. Also, I've clearly been watching way too much Project Runway and feel like everything needs an extra twist pulled from the velvet button bag that is my brain.


I juuusst barely eeked this out of 7/8 of a yard, but it meant I had to shorten the sleeves. I like how the elbow-length came out though. I cut a size Small for the arms and neckline, and then widened out at the hips using my Sewaholic Renfrew as a guide. I also made the arm and sleeve bands a little narrower and cut the underarm/dolman sleeve area a little higher.


Lest you get the wrong idea and think that one day I just woke up a sewing wizard, let me let you in one a little secret: I glued down the neck band. I was having some trouble because it was so narrow, and I didn't have enough fabric to cut a wider one. Plus, the brown thread I was using didn't match all that well, so the topstitching looked funny. So I sewed right sides together, flipped the band over, and glued it down using iron-on adhesive tape. Not my finest moment, but you can't tell from the outside.


Not too shabby, especially considering my whole goal was to practice more with knits and try a new silhouette. I'm putting this one in the win column.

P.S. Check out my new blog design! I couldn't have done it without helpful tutorials from Portia of Miss P on creating an archive page, and Sew Many Ways on how to make a header.

Saturday, August 24, 2013

Comic Book Skirt

Hello again! I recently finished a second version of Simplicity 2226, in a really fun print. Inspired by Cindy of Cation Design's geek dresses and Leila of Three Dresses Project's Comic Book Hummingbird skirt, I decided to make one up myself for Dragon Con.


Okay, okay, this might be quilting cotton. Shhh...don't blow my secret identity (I'm still a sewist!). They don't seem to make novelty super hero prints in apparel fabric, so sometimes you just have to take a leap (wearing your web-slingers, of course) and try and choose the pattern wisely. Originally I was going to make a dress, but I decided to go back to the skirt pattern Simplicity 2226, because I've made it before with a fairly stiff fabric. Also look at this print! It's awesome, but also a whole lotta look. An entire dress would have made other people cross eyed.


I flat measured the dimensions of my last version of it, and then decided to cut a 6 in the skirt and a 14 in the waist. I knew from the last go around that with stiffer fabric, the gathers wouldn't drape well and I was better off just cutting a smaller skirt to begin with.


After putting in the zipper I realized it was way too big in the waist, so I ripped it out and then took it in by about 5/8" on each side of the center back seam. Happily, the second time I put in the zipper I think I did a better job. I prefer invisible zippers, so I used that instead of the lapped zipper it called for.


I didn't even attempt to match the pattern in the back because I squeezed this out of 1 1/2 yards of fabric. In fact, I had to piece together the inner waistband from a bunch of tiny pieces - it was a little like quilting!


I usually follow the directions to the letter, but I got a little brazen with this one. Invisible zipper! Machine invisible hem! Nicer finishing! My biggest change was the the inside finish of the waistband to give it a cleaner look. This pattern is marketed towards beginners, so it instructs you to leave the bottom edge of the waistband exposed, like this:


It looks messy to me, even if it is technically a finished edge, so this go around I folded the edge under and stitched it down.


My favorite part about this is the pockets. I love it when skirts and dresses have pockets!


It's funny, I remember the first time I made this skirt it took me weeks and weeks and felt like an uphill climb the whole way. This time, though, it all came together pretty quickly and easily. I really must be getting better at this. Except for gathers. Those are kind of my kryptonite. I must have redone the gathers 3 or 4 times, trying to get them evenly spaced, and eventually settled for good enough.


Still, I'm overall really happy with how this came out, and I'm beyond excited for Dragon Con.


I hope you all have fun Saturday plans. I have do some house cleaning and errands (ugh) before I head out to watch a rolly derby match with some friends. I've been dying to see roller derby since that Ellen Paige movie came out a couple of years ago!

Sunday, July 28, 2013

Cake!

Hello again! Not a ton of sewing this weekend, mostly because I spent most of Saturday making this:


Brian doesn't like to make a big deal about his birthday, but the one part he does enjoy is the cake, so I do it up big every year. I don't subscribe to the idea that adult birthdays are limited to minimalist white sheet cakes with sprinkles. I mean, you never get too old for R2-D2, right? He absolutely loved it and pronounced me the best wife ever.

I really enjoy coming up with a concept each year and making it happen, usually making a giant, delicious mess along the way. I made one 9" round (cut in half and stacked) and 12 cupcakes. While the cake was cooling, I made marshmallow fondant from scratch. It's about 100 times more delicious than regular fondant, but man, is it a sticky, sticky mess. The kitchen looked like a powdered sugar bomb exploded by the time I finished.

I don't think R2-D2 quite tops this Tron one from a couple of years ago, but I'm still pretty happy with it.


While I was looking for the Tron picture, I found this Lego cake, which came back from the brink of disaster. The layers weren't level, so the top cracked and I thought, no big deal, I'll just use frosting like caulk. As I was frosting everything together, the air conditioning broke (at the height of summer in Florida), so the apartment just got hotter and hotter and the frosting started to melt. After 20 tense, sweaty minutes, it was business in the front..

 .
..and a party in the back. Yes, that is a spice jar and toothpick propping up the back of the cake. You can't make this shit up. This picture still cracks me up.


This transformers one was the first time I made marshmallow fondant, but I don't remember it being such a pain. This one was strawberry flavored and particularly delicious, and obviously, from before the trainwreck that was Transformers 3 was unleashed on the world.


Hope you all had great weekends, filled with deliciousness.

Sunday, July 21, 2013

Striped Sorbetto

Hello again! Today I have a Sorbetto top to share. After seeing just about every sewist in the blogosphere make a gorgeous version of this pattern, I had to give at go too. Colette has some super cute patterns, but I've been a bit scared of them because they are drafted for a C cup, and I'm, um, significantly smaller. But between the free pattern and and 50¢ remnants from Fabric World in my stash, this seemed like the perfect project to experiment with a small bust adjustment.


And it wasn't nearly as hard as I thought it was going to be! I used this excellent tutorial by Megan Nielson and it dramatically improved the fit. Before this I tended to deal with my small bust by cheating and using the smallest sized dart. This did help, but the bust was usually still a bit too big. I really should have tried an SBA sooner. Sometimes I'm stubborn.


I also made some other adjustments that are pretty typical for me: I lowered the armholes by 3/4",  added in more waist shaping, and added length. I just cut the longest size instead of properly lengthening, and think I would add another 1/2" to 1" to if I made it again.


It was also my first time sewing stripes, and that wasn't as fiddly as I thought it would be. The front came out pretty well, but the sides are slightly off because I didn't account for the dart. Oops. Lesson learned.
 

I'm still learning my fabrics, but I think it's a voile. It's pretty lightweight and just a tiny bit sheer. I had two remnants from my trip to Fabric World last year. I experimented with a bunch of different layouts, but try as I might, I didn't have quite enough fabric. My solution? Piece it together, not on the back center fold or anything conventional. Nope.


Instead, I pieced it together on upper back, across my shoulder blades. Seriously. And it worked! I painstakingly made sure the seam was at the edge of a stripe, so it's practically invisible.


The bias binding is store-bought, but matches remarkably well. I think next time I might try making my own bias tape.


Overall, it's not too shabby for under $5 and a couple weekends. I had a lot of trouble with the pleat in the center, but that was totally my fault. It helps to stop, take a breath, and actually read the directions, you know? Oh, and then after you do that, make sure everything is lined up properly. Third time's a charm. Sigh.

I also would have had this finished sooner except after I finished I decided the armholes were still too high. I had to rip out and redo the bias binding but it was totally worth it. High armholes digging into my skin is one of my biggest problems with RTW and I'm not going to stand for it in items I make myself!


Also, sorry these pictures are pretty terrible. It's been raining every day for weeks now. While the rest of the country is in a heat wave, we have had maybe 1-2 sunny days since June, so I finally gave up and took the pictures indoors. My husband was more interested in getting back to the news from Comic Con than being my photographer. Not that I blame him - the Veronica Mars trailer from Comic Con is out and looks amazing!