Saturday, June 23, 2012

The $1.50 Tote Bag

The past couple of weekends I have been working on making a tote bag using some of the fabric remnants I bought for 50 cents at Fabric World. After I caught the $1 pattern sale at Joann's, I decide to challenge myself, Project Runway-style, to make the bag using only what I had in my stash. Here's the final product:


This whole idea came from the new Lisette tote bag pattern, which is adorable and summery, but my plans were dashed when I realized both views call for about double the amount of fabric I had. I settled for Simplicity 2685, determined to make this work. I wasn't sure which view I wanted to make initially, but view D (top right hand corner below) was the only that wasn't way too wide for my remnant. Happily this was the one I liked best.


Even with view D, I had to quite literally cut corners and dip into the seam allowance because I didn't have quite enough fabric.

I also had to shorten the straps by about 3/4 an inch. I am a glutton for punishment, aren't I? Sheesh.

The lining and interfacing were both leftovers from other projects, the button was an extra that came with a jacket, and I happened to have a zipper in the right length. Neither the lining or the zipper were anywhere close to the ideal color, but I was on a "make it work" mission!

My one complaint about this pattern is that the opening for the zipper was much wider than it needed to be, and as a result it looks a little sloppy. Well, at least mine does. I'm sure the fact that I was hungry and in a rush to finish putting it in before dinner was ready has absolutely nothing to do with how it looks. Nothing at all.

I'm about to take my new tote bag out for an afternoon of thrifting and checking out the Batmobile. Happy Saturday!

Saturday, June 9, 2012

Indy Craft Experience

Last weekend I went to a craft show called the Indy Craft Experience (ICE). As you probably can guess from the name alone, this was a craft fair that aimed to be a bit more sophisticated than most. Rather than funnel cakes and corn dogs out in the sun, there were macaroons and the poodle  (a hot dog in french toast bun topped with apple slaw) in an air-conditioned art gallery. While most craft fairs have anything goes feel with vendors selling everything from barbecue sauce to hair scrunchies, the vendors at ICE were "curated", giving you the feeling of Etsy brought out into real life.

As one of the first 250 through the door on Saturday, I got this awesome swag bag, which completely justified the $5 entry fee. It was mostly filled with business cards, but there was a pet rock, some 3x5 art cards, a couple of fabric pins, a magnet, and other fun items, not to mention the tote bag itself.

I love the design on the tote: Ice, Ice, Baby
Walking around the show, had to laugh after one too many crafters decided to put a bird on it, but there was really some great stuff. I felt weird about taking pictures of the vendor's wares while I was there, but I figure it's okay to repost some of the pictures from the ICE website. There were several tables of sewn items, including these cute tote bags and summery circle skirts:


A Squared W


SoSheSews
The ridiculously cute amigurumi at the NeedleNoodles table made me want to pick up their book Creepy Cute Crochet and give crochet another try.
NeedleNoodles
And I loved this jewelry, but sadly, it was not in my (tiny) budget.
Cameoko
I was able to pick up this adorable and inexpensive art print by Katie Coleman Illustration, which really captures the essence of our cat.
"I'm tough"
Pippin thinks of himself as hard-nosed tiger, spending his days ruling over the squirrels in the woodsy view and keeping his mouse toys in line, which is a little at odds with the reality that he desperately (desperately!) needs to be petted the nanosecond I wake up in the morning because he had to go 8 long, arduous hours without anybody adoring him.

The Indy Craft Experience was a pretty pleasant way to spend a Saturday morning. My only regret is that I ran out cash and didn't get to try a poodle...


Sunday, June 3, 2012

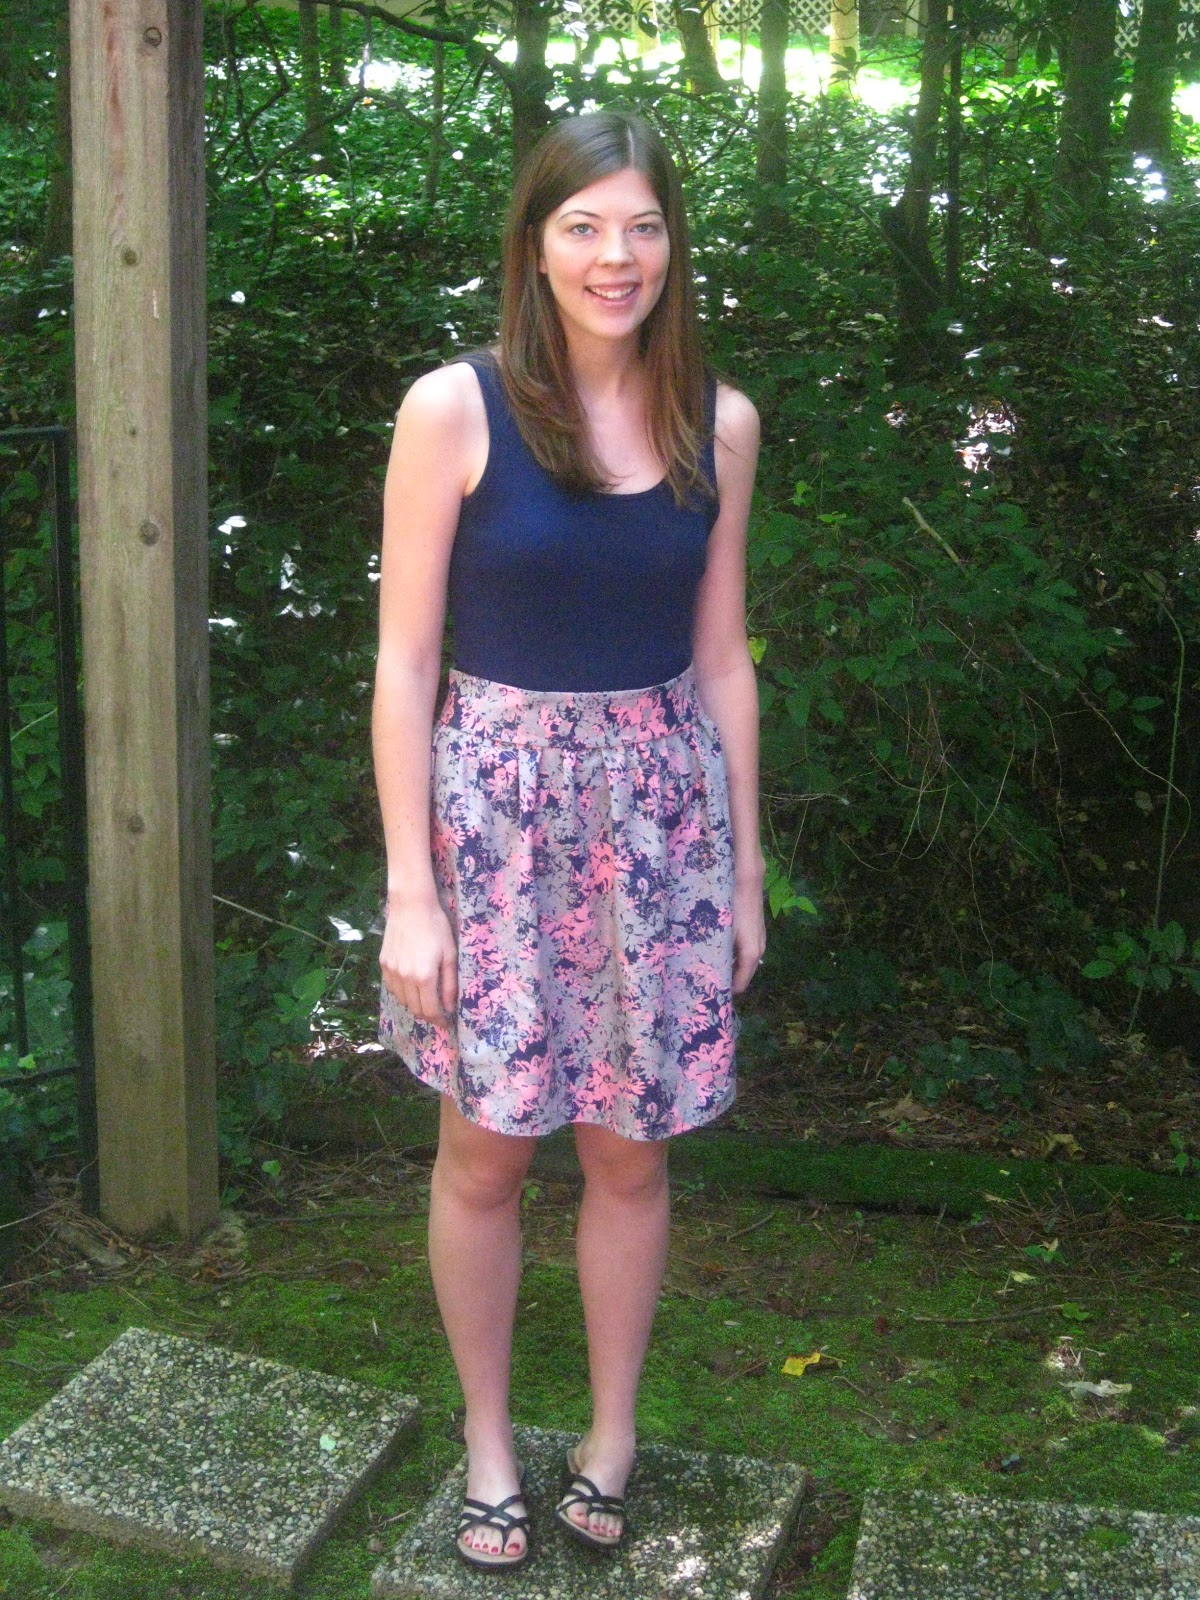
A tank top dress, the hard way


Inspired by other the DIY tank dresses popping up all over on Pintrest (like this one and this one), I decided to make my own. I thought it would be an easy weekend project, a nice change of pace from the some of the longer-term projects I have in the works. Besides, a girl can never have too many sundresses.

I'm pretty happy with the end result, but it was a three week struggle to get here, mostly because of my own questionable decisions.


Here's how you too can make your own tank dress the hard way:

Step 1: Buy the end of a bolt of fabric, so that there is juuussst enough to get by. In a moment of desperation, decide to use the selveges to make the hem in order to avoid having a voluminous miniskirt (not a good look on windy days).

Step 2: Buy a tank top that is at least a full size too big because it it $6 and the perfect shade of blue. Shrink it in the dryer and then take in the sides, only to discover it has magical growing abilities. Begin to lower your standards for this dress.

Step 3: Try elastic thread for the first time to gather the waist. Spend at least an hour fussing with the tension on your machine before giving up and deciding to make a normal elastic waist with a casing. Bask in the glow of your achievement for about 10 minutes until you realize that you will still need to use the elastic thread to attach the tank top to the skirt so you can fit it over your head and shoulders.

Step 4: Do a really bad job attaching the two halves of the dress, so that when you try it on the bunched-up tank top makes you look like you have a tumor in your abdomen. Redo the seam.

Step 5: Ask your husband to take pictures of your new dress out in the woodsy view. Fish for compliments the entire time. Ask repeatedly if Michael Kors would tell you that you look like "Becky Home Ec-y".

Tuesday, May 29, 2012

Adventure: Fabric World

At kitting group this past week I heard about this place called Fabric World that is essentially a Big Lots for fabric. Apparently they had a ton of remnants selling for 25 cents apiece, much of it designer fabric, going fast. It sounded like a dream come true. This place was literally calling to my thrifty soul.

So when I was let out of work a bit early on Friday, I knew just how to kick off Memorial Day weekend. I took the 30 min drive over to Stone Mountain to check it out for myself.

And it did not disappoint.


While they had a few things on bolts, most of the store was table after table of fabric remnants. It was just the kind of treasure hunt I love. The signs around the store were layered, so you could see how the fabric started at $2.00 per piece and then worked its way down to 4/$1.00.


The cashier told me that people had been coming in and buying two or three carts of fabric at a time! I can't really blame them - it was the deal of the century, especially if you are a quilter. I also overheard several women talking about how this was their second and third trip, and that the remnants were starting to get picked over. I don't know what they were talking about - there were still gems like this to be had:


I am not much of a stash person (in my mind I still live in our tiny 650 sq ft apartment in Tampa, where clutter is the enemy), so I tried to be a bit choosy, focusing on finding larger pieces of fabric and knits.

An hour or so of digging and $4.77 got me all of this!

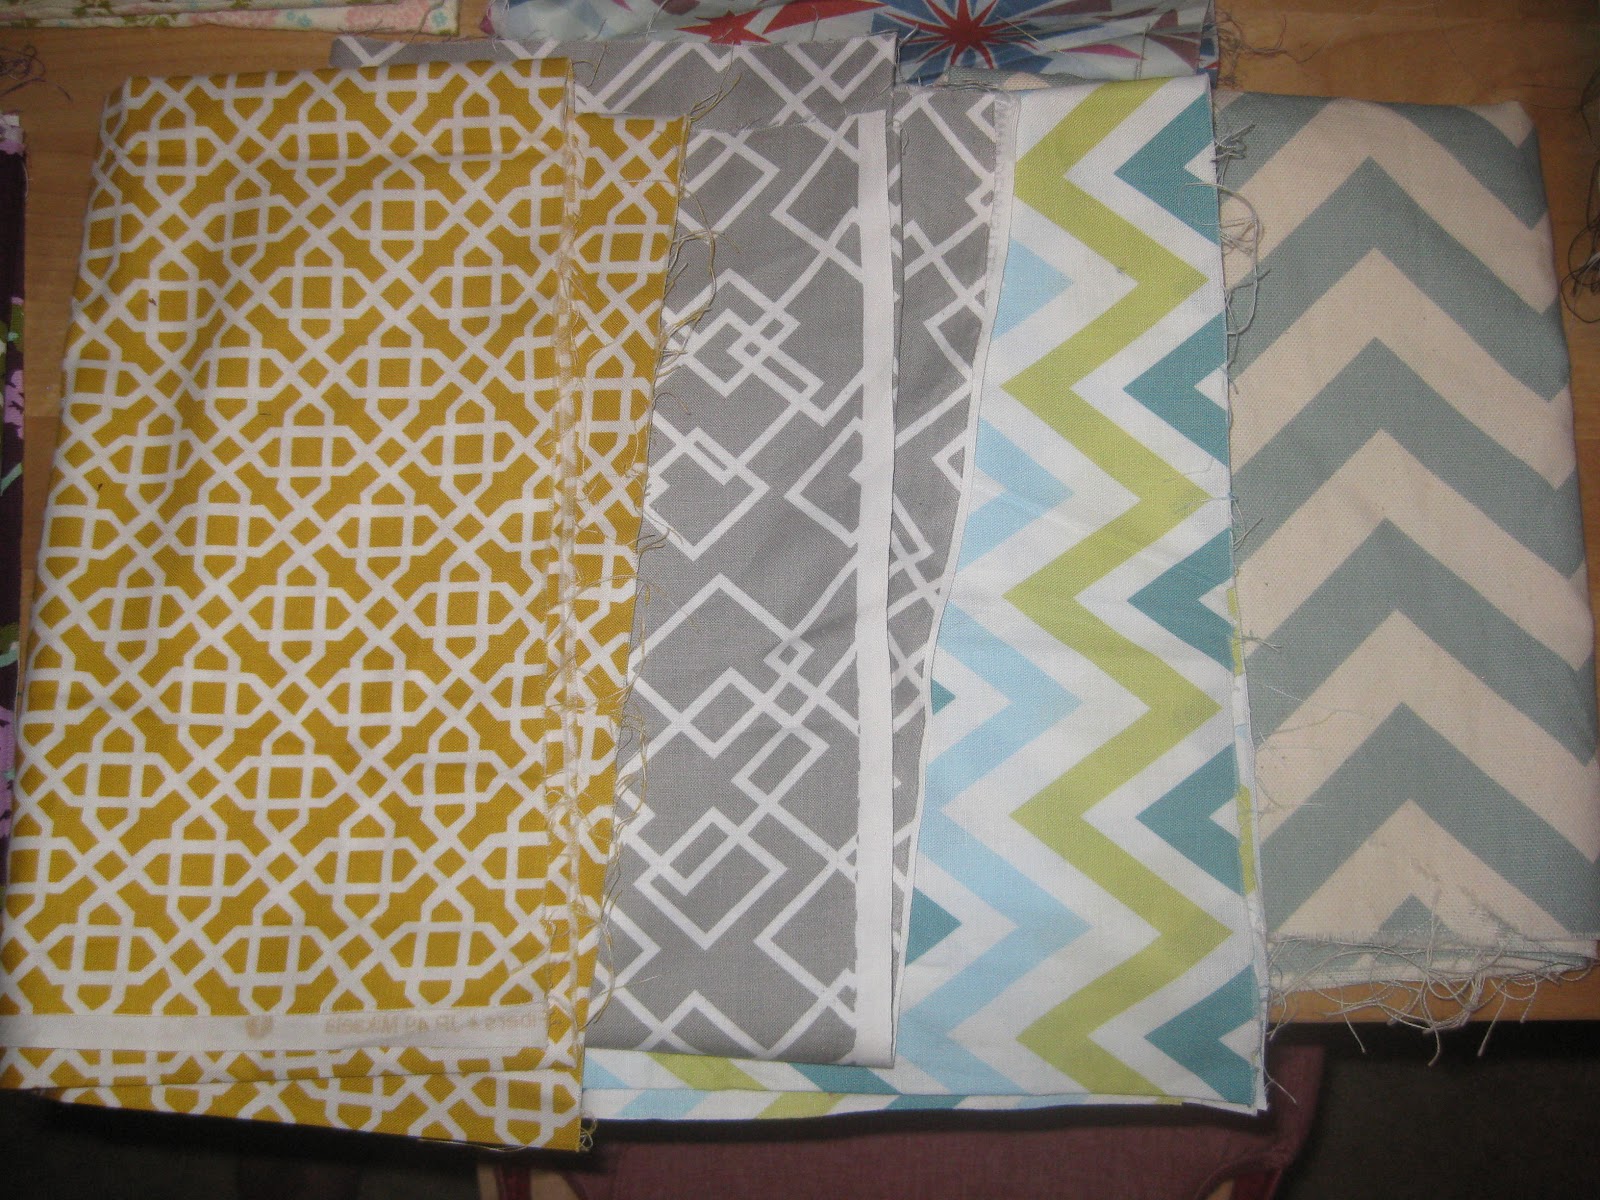
I got knits to experiment on as I learn how to use my serger better, some fun cotton prints for project bags or whatever, some lightweight cotton for a summer scarf and a couple of things I have no immediate plans for but thought were nice. I think I'm most excited about these geometric prints that I'm going to make into a tote bag and purse:


Okay, maybe I am a bit of a stash person after all. It's a good thing Fabric World isn't right down the street, or my closets would explode, but it's definitely nice to have an inexpensive alternative to Joann's.

Thursday, May 24, 2012

Work in Progress: Mrs. Darcy Cardigan

I've been working on my first sweater, the Mrs. Darcy Cardigan from the book Knits that Fit. I have sleeves!

Clearly I have a ways to go, but I'm pretty proud to have made it this far. Now that I'm looking at this picture, they seem a bit short, but I can add on a few more rows before I do the raglan shoulder.

The finished product will hopefully look like this:
Source
It's a bit terrifying because it's knit from the bottom up, and I am not using the recommended yarn. Back when I decided to start this sweater, I lived in Florida, where there are about three days a year cold enough for a wool sweater. Cotton seemed much more practical, so I went with Knit Picks Comfy Worsted in Peony.


So far, so good! I'm off to my Thursday night knitting group. This has been a great project to take along because stockinette is so mindless I can chat away without worrying much about mistakes. I've already started the body, so my goal is to finish the whole sweater by the end of the summer. Of course, I'll be taking a break for the Ravelympics (Team TARDIS!).

Tuesday, May 1, 2012

An award and a parade!

First I would like to say thank you to my dear friend Kristen over at Glitter, Gloss and Glaze, who awarded me the Liebster Award. This is given to new bloggers with less than 200 followers.


Kristen is one of my Tampa Bay friends that I sadly had to leave behind, but I love keeping up with her blog.
 
Anyway, I'm very honored and I'd say that this calls for a parade! Kidding, kidding. This past weekend I went the Inman Park Festival, a neighborhood arts and crafts fair known for it's quirky, anything-goes sensibility. It was a lovely day, and I was able to cross off several things from my Atlanta bucket list: taking the MARTA train, eating a King of Pops popsicle, trying a new food truck (well, in this case a 70's camper-van called The Pickle). Best of all, there was a parade. Oh man I love a good parade. In all honesty, I care more about the Macy's Thanksgiving Day Parade than the food afterward.

And this parade did not disappoint. There were kaleidoscope marching bands:


...boxy cardboard superheros....


...an LGBT marching band with sparkly outfits. I didn't get a picture of the baton twirler because I was so mesmerized, but trust me, he was working it...


...a Chinese dragon...


....whatever these are...


...the Bridesmaid Brigade...


....Elvis....

...cross-dressing....

...and dozens of gnomes! Apparently they were trying to beat some kind of world record. Many had funny signs ("I'm sexy and I gnome it") or a clever spin, like the "Gnomeland security" group.


It was all just so delightfully eclectic. Added to fun was the group of drunk guys next to us that cheered for literally everything that came by, no matter how absurd, ranging from summer camp to termite protection. By the time the parade was over, I was sunburned but satisfied. Inman Park, you know how to throw a party.


Tuesday, April 10, 2012

Jewelry Organization

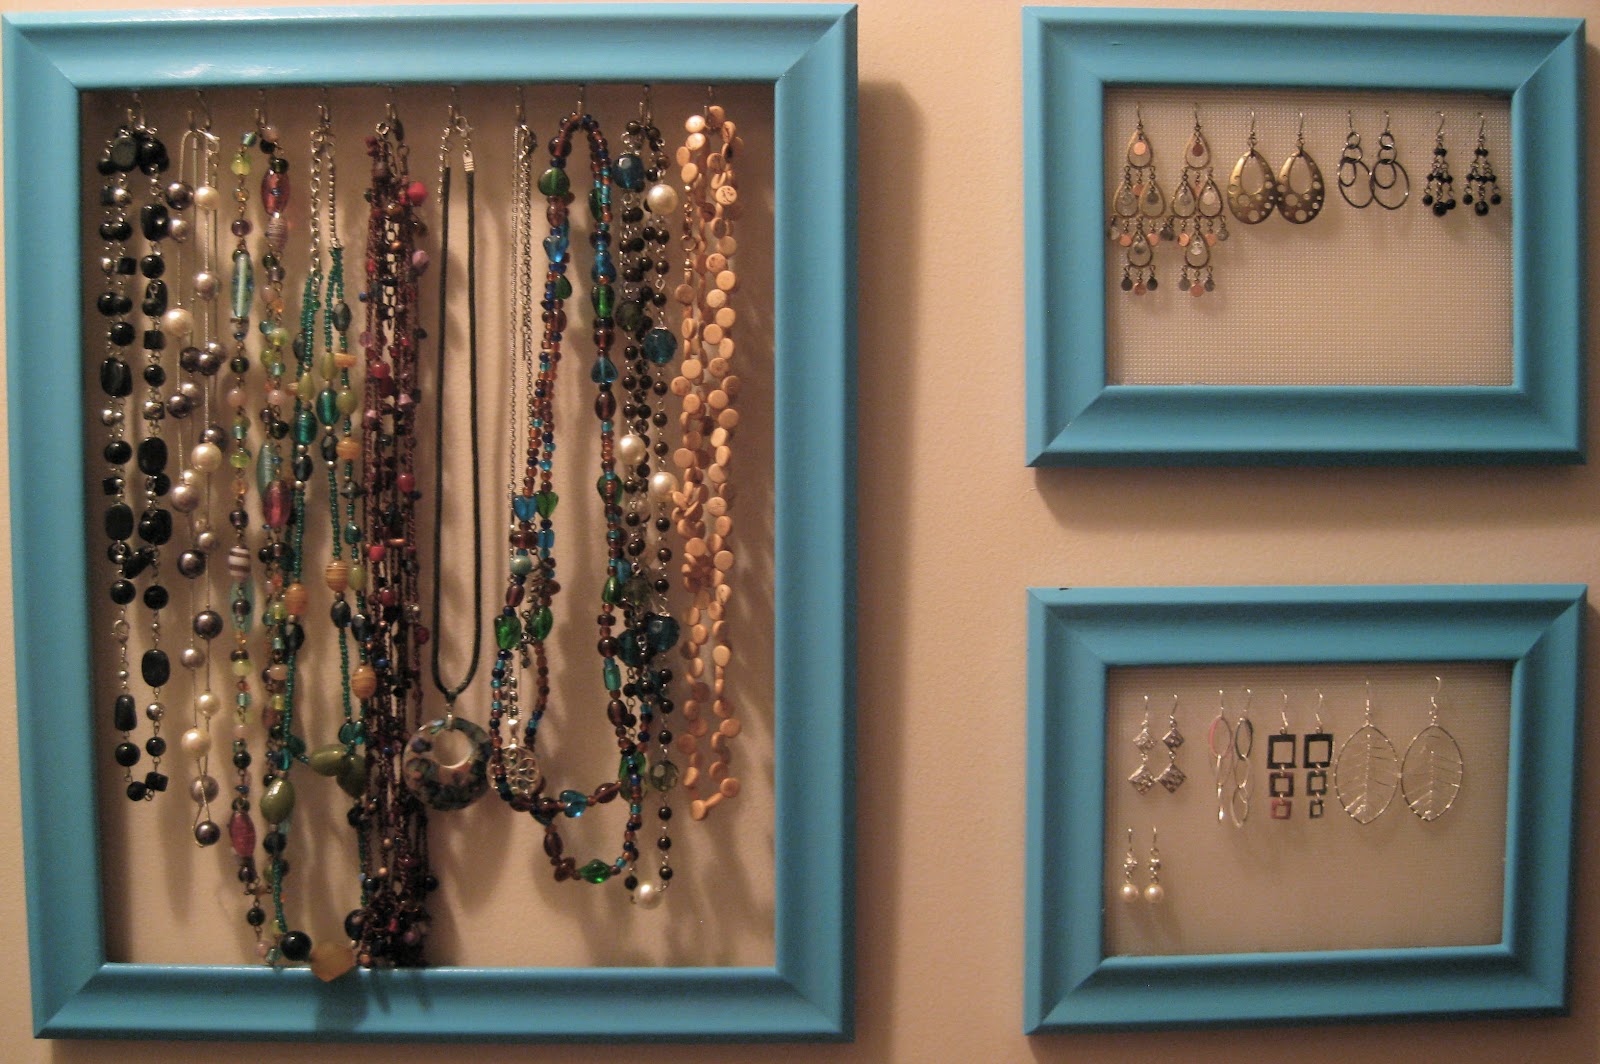
Jewelry organizers were all the rage on Pintrest a couple of months ago, a fun way to merge pretty with practical. I immediately latched on to this idea, having a complete "duh!" moment. My old system was to pile all of my jewelry on my dresser and then pick it up off of the floor in the morning after my cat's nocturnal adventures. Seriously. I did this for months. Like I said, duh.

Sidenote - I present this as evidence that Pippin delights in knocking things over:


Anyway, I picked up some cheap frames from the dollar store, and some craft paint from Michael's (Martha Stewart's Gloss paint in Pond). The original plan was to display my jewelry in my bedroom, but after Daylight Savings hit it was pitch black in the morning and I started getting dressed in the closet to avoid waking up my husband. So my jewelry needed to move to the closet too.


If could do this again I wouldn't bother with the painting. I don't know whether I should have sanded the frames first or the craft paint was just sucky, but the paint is incredibly easy to chip. In fact, I managed to chip a big chunk off while hanging the frames up, you can see it a little bit on the top left-hand corner of the bottom frame:


I used a glue gun to put in clear plastic cross stitch canvas for the earrings. The canvases come in relatively small sizes, so I had to buy two smaller frames instead of a single 8"x10" as I had originally envisioned. The holes in the cross stitch canvas are the absolute perfect size for earrings, so I'm happy with it.

As for the necklaces, my husband helped me drill holes about an inch apart to screw the hooks into. The first few hooks went in fine, but eventually the wood split, leaving the hooks wobbly. I filled in the empty space using a glue gun, and this made things much more secure.


Once the hooks were in, the frame no longer laid flush against the wall, so I cut a few strips of cardboard out, and glued them against the top part of the frame, essentially projecting the frame out from the wall about half an inch. Then I used velcro hanging strips to secure the frame to the wall. You can see in the picture below that it's mounted at little bit of an angle to allow for the hooks:


Overall, I'm really happy with how this project turned out. I even enjoyed coming up with solutions to the little challenges that cropped up along the way. And, best of all, my jewelry is now safely out of Pippin's reach.